


Weather Station Placement: Mount Sensors for Better Readings
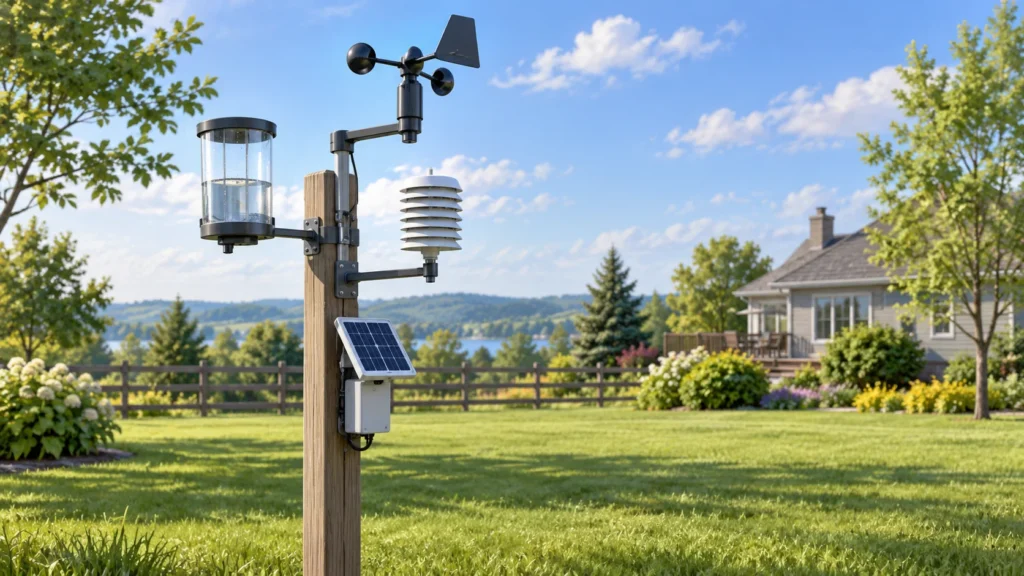
Buying a capable weather station is only part of the job. The outdoor unit can report conditions that are technically real but unhelpful if it sits beside a warm wall, beneath a roof overhang, or in a pocket of blocked air. Good placement does not make a consumer station equivalent to a professional observing site; it does make the measurements more representative of the location you want to understand.
Start by deciding what “local” means for your project. A backyard station should describe that yard, while a farm station should represent a field or irrigation zone rather than a nearby parking area. The general principle is to choose a site with minimal artificial influence and enough exposure for the relevant sensor. CODA Sensors explains why nearby heat sources, reflective surfaces, buildings, and other obstructions can distort outdoor measurements.
Before drilling or pouring a footing, read the station’s manual. Sensor combinations, mounting diameters, wireless limits, grounding instructions, and allowable orientations vary. Treat the distances and heights below as practical targets, not universal rules that override the manufacturer’s instructions.
Choose the site before the mount
An open yard is usually the easiest starting point because it offers separation from walls, roofs, paving, vents, and trees. A natural surface such as grass is generally preferable for temperature and humidity measurements to concrete, asphalt, gravel, or a roof that absorbs and re-radiates heat. Keep the sensor away from air-conditioner outlets, dryer vents, chimneys, vehicle exhaust, and other sources of forced or radiant heat.
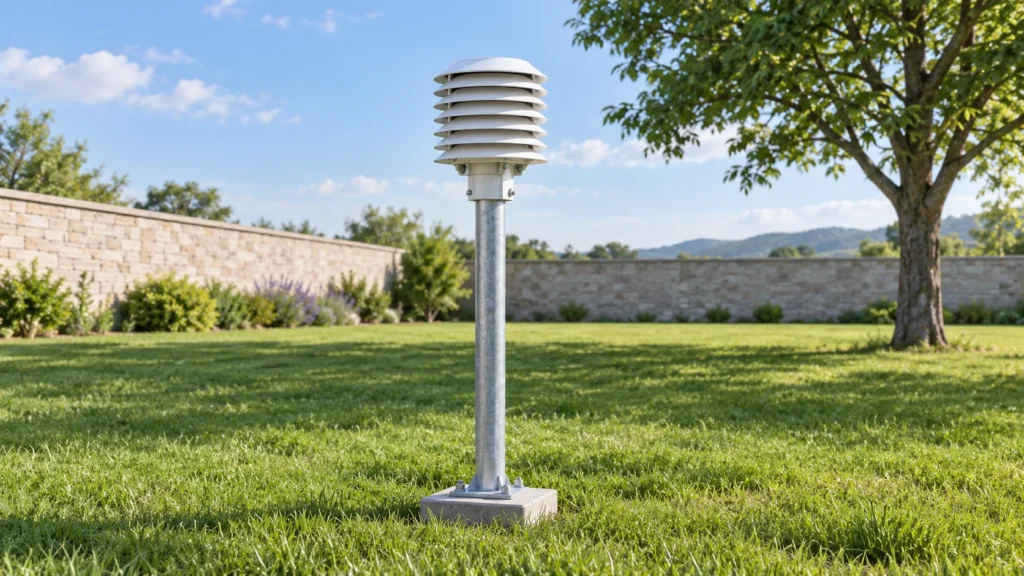
Shade needs a careful explanation. Temperature and humidity sensors should be protected from direct solar heating, but placing them under a porch or dense canopy can also block airflow and precipitation. A ventilated radiation shield is usually a better solution than simply hiding the sensor. The shield should allow air movement while reducing direct sun and rain exposure; CODA’s placement guide describes radiation shielding as a way to protect temperature sensors from solar heating without enclosing them in stagnant air.
A wall mount can work when an open yard is unavailable, but a wall is not neutral. It can store heat, block wind, and create a narrow microclimate. A north-facing wall may receive less direct sun in some regions, yet orientation alone does not solve heat radiated by the building. Leave as much clearance as the site permits and avoid mounting directly above paving, vents, or a sun-heated façade.
Roofs can provide height and wireless convenience, but they introduce warm surfaces, reflected heat, vibration, and turbulent airflow. If a roof is your only practical option, raise the sensors clear of the roofline where the structure and manual allow, secure the mast against movement, and consider professional help for structural attachment and electrical safety. Do not place a rain gauge beneath an eave or near a roof edge where runoff can enter it.
Place temperature and humidity sensors
For ordinary outdoor observations, position temperature and humidity sensors above the ground at approximately eye level rather than close to soil, walls, or roofs. The reference material collected for this guide places the commonly used target around 1.2 to 2 metres, or roughly 4 to 6.5 feet, but your station’s design may call for something different. Weather Station Advisor summarizes citizen-observer-style targets for a shielded temperature and humidity sensor.
- Use a ventilated shield: It should reduce direct solar exposure while allowing air to circulate around the sensing element.
- Choose representative ground: Grass or another natural surface is usually more informative than asphalt, masonry, a metal roof, or a heat-absorbing wall.
- Separate from obstacles: A nearby tree, fence, building, or wall can change shade, airflow, and humidity. More distance is helpful; when space is limited, record the compromise.
- Avoid artificial airflow: Keep the sensor away from heating and cooling outlets, vents, fans, and exhaust.
- Keep it accessible: You will need to inspect the shield, replace batteries, and remove dust, insects, or debris.
Do not confuse “shaded” with “sealed.” A box, porch, or dense hedge may prevent sun exposure but also trap moisture and slow the sensor’s response. The objective is shaded, ventilated air—not an enclosed cavity.
Mount wind sensors in clear air
Anemometers and wind vanes are especially sensitive to obstacles. Buildings, trees, fences, roof ridges, and nearby masts can block, accelerate, or swirl the flow. A sensor beside a wall may report a local eddy rather than the broader wind direction. Narrow alleys and spaces between structures are usually poor choices.
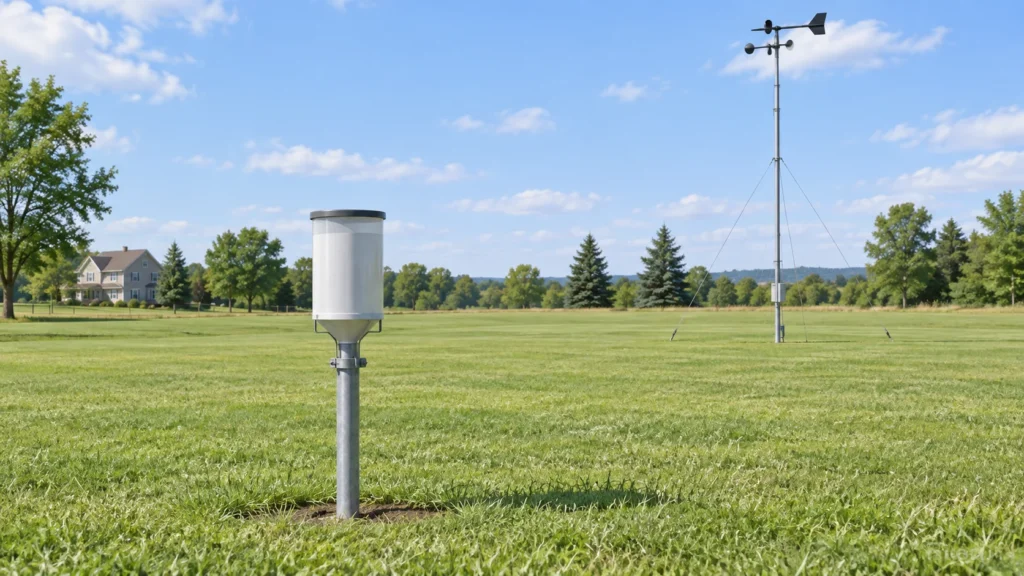
The conventional reference target for wind measurement is about 10 metres, or 33 feet, above ground, but that is often impractical at home. If you cannot reach it, mount the sensor as high and as clear of surrounding obstacles as your property, local rules, and safety constraints permit. A shorter, stable mast in an open yard may be more useful than a taller unit beside a roof or tree.
Stability matters. Swaying poles, loose brackets, and vibrating roof mounts can affect wind observations and may eventually damage the station. Use a rigid mast, appropriate anchors, and guy wires where the height and exposure require them. If the wind sensor is mounted to the side of a pole rather than at its top, follow the station maker’s clearance guidance so the mast does not interfere with the sensor.
Wind and temperature goals often conflict in an all-in-one sensor suite. Raising the entire unit helps wind exposure but may put temperature and rain sensors too high; lowering it improves access and can suit temperature and rainfall but leaves wind more obstructed. Weather Station Advisor identifies this as an unavoidable compromise for many residential all-in-one installations and suggests a mid-range height rather than treating one ideal as universal.
Give rain gauges an open, level view
Rain gauges need exposure to falling precipitation without collecting runoff, splash, or drips from nearby objects. Place the gauge away from eaves, branches, gutters, roof edges, and the drip line of trees. A location that is open to the sky is preferable to a sheltered corner, while a natural surface can reduce splashback compared with hard paving.
Leveling is essential. A slight tilt can alter the effective catch area or the behavior of a tipping mechanism. Use a bubble level during installation and recheck it after storms, frost, settling, or accidental contact. The support must be firm enough that wind cannot lean or rotate the gauge.
Clearance rules differ by installation standard and gauge design. Some guidance uses an obstacle-distance multiplier, while other practical guidance prioritizes a nearby open area and an accessible mounting height. Rather than applying one number blindly, identify the nearest tree, wall, roof, or fence and move the gauge as far away as your site allows. Keep the funnel and screen clear of leaves, insects, and sediment, and make cleaning part of seasonal maintenance. Weather Shop highlights level placement, avoiding splash and shelter, and keeping the gauge away from overhanging vegetation.
Check wireless range, leveling, and safety
A scientifically attractive location is useless if the console cannot reliably receive it. Wireless range depends on the station, walls, building materials, interference, terrain, and battery condition, so test communication before permanently anchoring the mount. A temporary setup can reveal dropouts without committing you to a roof or concrete footing. Follow the manufacturer’s stated range and installation limits rather than assuming an advertised open-air distance applies through walls.
Level the rain gauge and any sensor that requires a defined orientation. Keep cable runs tidy, protected from chafing, and arranged so they cannot pull on connectors. On elevated or metal installations, follow the product instructions and local electrical requirements for grounding and lightning protection. Work at height only with suitable equipment and assistance; moving a mast or drilling into a roof can create risks unrelated to weather measurement.
A hypothetical worked example
Imagine a homeowner with a small backyard, a two-storey house on one side, a six-metre tree on another, and a paved patio near the wall. The homeowner wants useful backyard trends, not a formal meteorological reference site.
- They place the temperature and humidity sensor on a freestanding post over grass, in a ventilated shield, several metres from the house and patio. The tree still affects the site during part of the day, so that limitation is recorded.
- They mount the wind sensor at the top of a rigid mast in the most open corner, choosing a lower but stable position rather than attaching it beside the roof ridge. The tree remains a wind obstruction, so wind readings are treated as site-specific.
- They put the rain gauge on a level short post in the open yard, away from the tree’s drip line and roof runoff. They test the level again after anchoring.
- They temporarily pair the outdoor unit with the console indoors, then move the console to the planned room and check for missed transmissions before final tightening.
This arrangement will not eliminate every local effect, but it makes the compromises visible and repeatable. Consistent placement is valuable when comparing today’s readings with the same site over time.
Buying and installation checklist
- Define the goal: neighborhood, garden, field, roof, or immediate property conditions.
- Read the manual: confirm sensor-specific height, orientation, mount diameter, wireless limits, and safety requirements.
- Survey obstacles: note walls, roofs, paving, trees, fences, vents, chimneys, and overhead lines.
- Choose the sensor location first: buy a pole, tripod, side mount, or extension that fits the real site.
- Protect temperature and humidity sensors: use the specified shield and avoid direct solar and artificial heat.
- Expose wind sensors: maximize clearance and use a rigid, properly anchored support.
- Level the rain gauge: keep it away from runoff, splash, branches, and eaves.
- Test wireless communication: verify the actual indoor route before permanent installation.
- Plan maintenance: leave safe access for cleaning, battery changes, leveling checks, and inspection.
- Document compromises: record height, surface, nearby obstructions, orientation, and installation date.
For help choosing a station whose sensor layout suits your property, visit TheTopZone’s weather-station Top Picks. Whichever model you choose, careful placement is one of the least expensive ways to make its data more useful.