For many of us, a mechanical keyboard isn't just a peripheral; it is a significant investment and a vital part of our daily workflow or gaming setup. That satisfying click, the tactile bump, and the premium aesthetic are things we want to preserve for as long as possible. However, between dust, skin oils, and the occasional crumb, your keyboard is constantly under siege. Proper maintenance is the difference between a board that lasts a decade and one that starts failing after a year.
If you have noticed your keys feeling a bit mushy, or perhaps the aesthetic appeal has been dulled by a layer of grime, it is time for a refresh. In this guide, we are going to walk through everything from daily dusting to the dreaded deep clean, ensuring your switches stay snappy and your keycaps look brand new. Let’s dive into the world of mechanical keyboard preservation.
Why Maintenance Matters for Performance
Maintenance is about more than just keeping things looking pretty. It is about functionality. Mechanical switches rely on precise physical contact to register a keypress. When dust or debris finds its way inside the switch housing or sits on the plate, it can cause 'chatter' (double-typing) or lead to a key not registering at all. Furthermore, the stabilizers—the parts that keep your larger keys like the Spacebar and Shift level—can become dry or clogged, leading to annoying rattles and friction.
Hygiene is the other major factor. Study after study has shown that computer keyboards can harbor more bacteria than a toilet seat. Since we touch these devices for hours every day, keeping them sanitary is a matter of personal health. A clean keyboard is a faster, healthier, and more enjoyable tool to use. Regularly clearing out the debris ensures that your mechanical investment continues to perform at its peak without any frustrating hardware hiccups.
The Essential Cleaning Toolkit
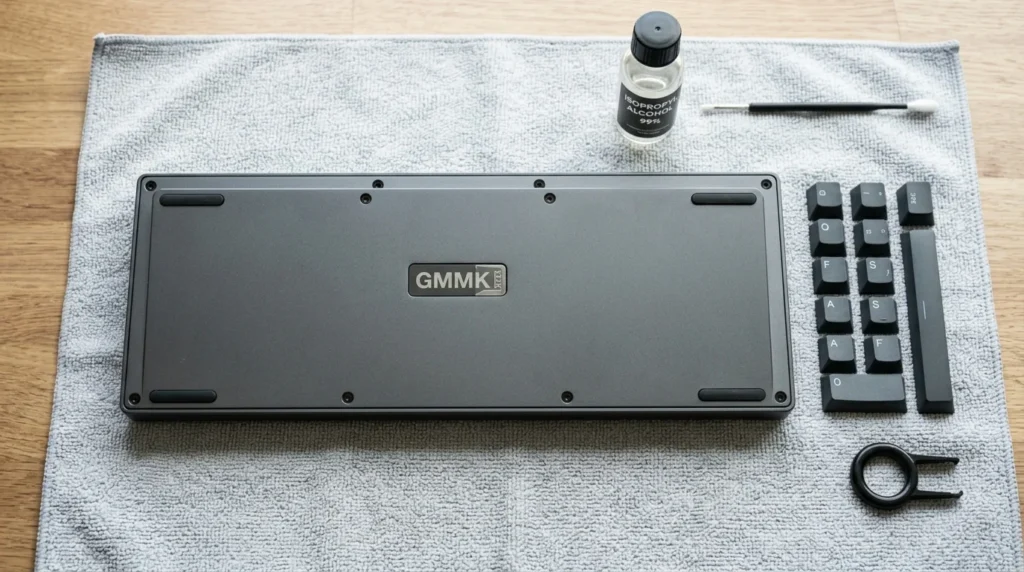
Before you start pulling things apart, you need the right tools. Using the wrong equipment can actually damage your keyboard, especially when it comes to keycaps and delicate PCB components. Here is what you should have in your maintenance kit:
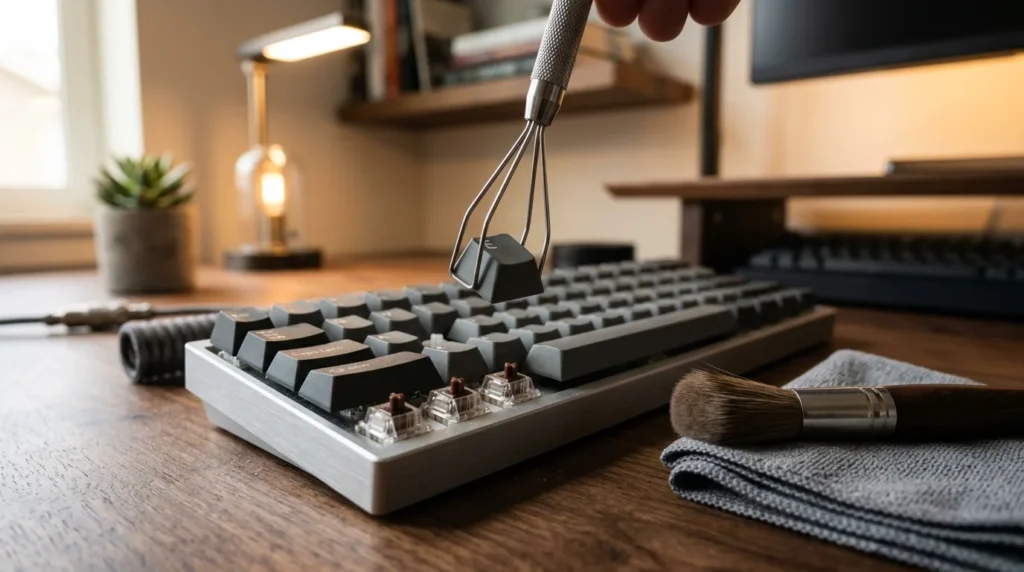
- Keycap Puller: Always use a wire-style puller. Plastic ring pullers can scratch the sides of your expensive keycaps.
- Switch Puller: Only necessary if you have a hotswap keyboard.
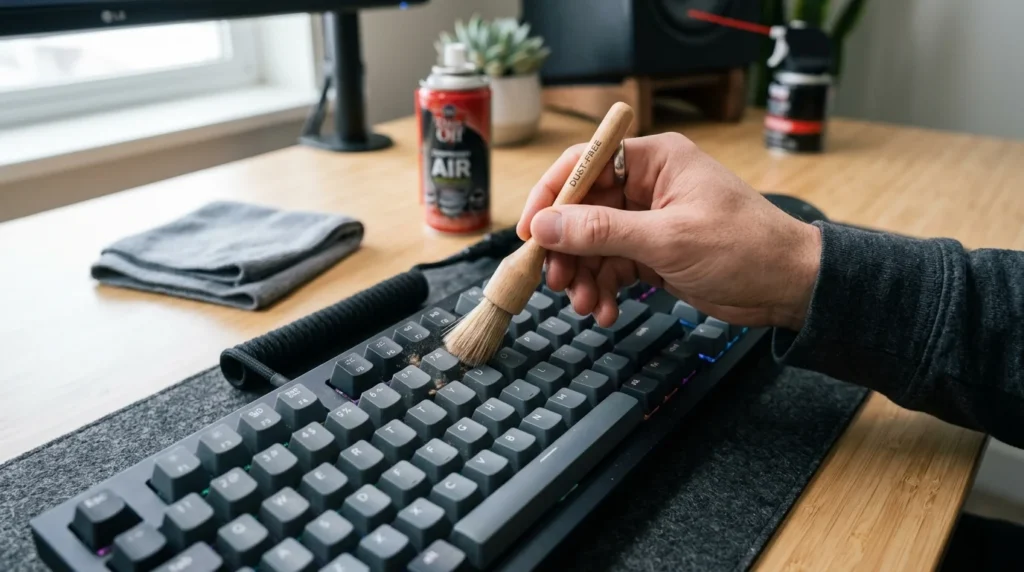
- Compressed Air or an Electric Duster: Essential for blowing out loose debris.
- Isopropyl Alcohol (70% or higher): For disinfecting and removing stubborn oils.
- Microfiber Cloths: To wipe down surfaces without leaving lint.
- Soft-bristled Brushes: An old toothbrush or a specialized keyboard brush works wonders for the plate.
- Ultrasonic Cleaner (Optional): If you want the ultimate deep clean for your keycaps.
Having these tools ready prevents you from making mistakes, like using a damp cloth that’s too wet or prying keys off with a screwdriver (please, never do that). With a proper kit, the process becomes much faster and significantly safer for your hardware.
Routine Daily and Weekly Care
You don’t always need to perform a full teardown to keep your keyboard in good condition. In fact, most of the work happens in the small, routine actions you take every week. A quick 'dust and wipe' can prevent the need for a deep clean for several months. I recommend keeping a small microfiber cloth and a soft brush at your desk. At the end of every few days, just give the board a quick brush-down to prevent dust from settling between the caps.
If you eat at your desk, stop! But if you must, make sure you flip the keyboard upside down and give it a gentle shake afterward. You would be surprised at what falls out. Using a can of compressed air once a week to blow through the rows can also prevent hair and skin cells from building up on the plate. These small habits take less than thirty seconds but drastically extend the time between major maintenance sessions.
The Deep Clean: A Step-by-Step Process
Even with the best routine care, skin oils (sebum) will eventually bond with dust to create a film on your keycaps, and the plate will collect debris that air can't move. This is when you need a deep clean. This process should be done every 3 to 6 months depending on your usage. It is a therapeutic process if you have the time, and the results are incredibly satisfying.
Step 1: Photo Documentation
Before you pull a single keycap, take a high-quality photo of your keyboard layout. Even if you think you know where every key goes, modern layouts can have subtle differences in the bottom row or navigation cluster. Having a reference photo will save you a lot of frustration when it is time to reassemble the board.
Step 2: Keycap Removal and Soaking
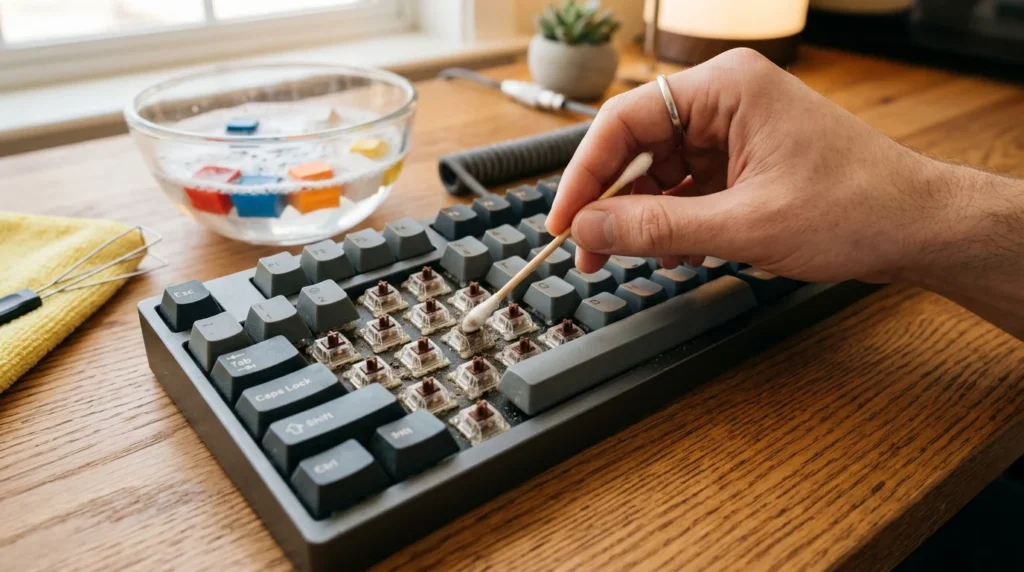
Using your wire keycap puller, gently remove all the caps. Once they are off, fill a bowl with warm water and a few drops of mild dish soap. Let the keycaps soak for at least 30 minutes. The soap will break down the oils and grime. Avoid using boiling water, as this can warp the plastic, especially if you have ABS keycaps. After soaking, you can use a soft toothbrush to scrub any stubborn spots before laying them out on a towel to air dry completely. This part is crucial: keycaps must be 100% dry before being put back on, as any moisture could drip into the switches and cause a short.
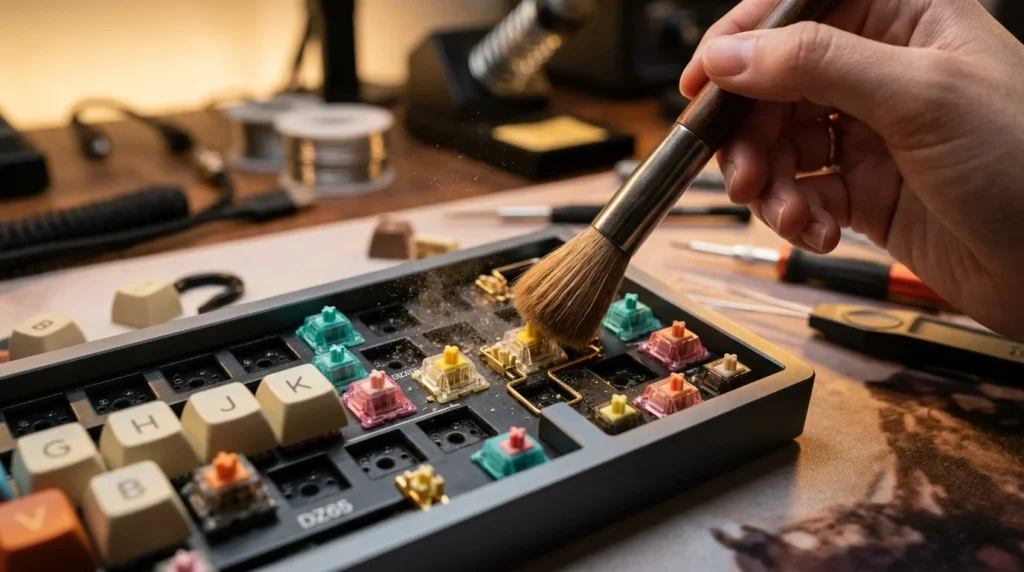
Step 3: Cleaning the Plate
With the keycaps gone, you will see the 'plate'—the surface the switches are mounted to. This is usually where the real mess lives. Use compressed air to blow away loose particles, then use a brush to loosen the stuck-on grime. For the truly stubborn spots, lightly dampen a Q-tip with isopropyl alcohol and wipe between the switches. Be careful not to let the alcohol drip inside the switch housings themselves, as it can wash away the internal lubricant.
Maintaining and Lubing Switches
If you find that your keys are starting to feel 'scratchy' or the larger keys are rattling, you might need to look at switch and stabilizer maintenance. This is a more advanced step, but it’s the secret to that premium, 'thocky' sound many enthusiasts crave. If you have a hotswap board, you can pull the switches out and apply a specialized lubricant like Krytox 205g0 to the internal sliders.
For the stabilizers (the bars under the Spacebar, Enter, and Shift keys), a small amount of dielectric grease on the wire ends can eliminate rattling. However, remember that less is more. Over-lubing can make your keyboard feel sluggish and 'mushy.' If you aren't comfortable opening your switches, simply keeping the area around them clean is usually enough for the average user to maintain a great typing experience.
Handling Spills: The Emergency Protocol
Accidents happen. Whether it’s coffee, soda, or just water, a spill is a potential death sentence for a mechanical keyboard. The moment a spill occurs, your priority is to cut the power. Unplug the keyboard immediately. Do not try to 'test' if it still works, as electricity running through wet components causes short circuits and permanent damage.
Once unplugged, flip the keyboard upside down to let the liquid drain away from the PCB. Remove all keycaps and wipe away as much liquid as possible. If the spill was sugary (like soda or juice), you will likely need to disassemble the entire board and clean the PCB with high-percentage isopropyl alcohol to prevent corrosion and stickiness. Let the keyboard dry for at least 48 hours in a well-ventilated area before even thinking about plugging it back in. Patience here is the difference between a saved board and a paperweight.
Long-Term Habits for Longevity
Beyond cleaning, how you use your keyboard affects its lifespan. Avoid 'bottoming out' with excessive force; while mechanical switches are durable, slamming them repeatedly can eventually fatigue the leaf springs or damage the solder joints on the PCB. Also, consider using a dust cover when the keyboard is not in use, especially if you live in a dusty environment or have pets. A simple acrylic cover or even a clean cloth draped over the board at night can significantly reduce the amount of cleaning you have to do.
Lastly, keep an eye on your cable. Frequently kinking or tightly wrapping your USB cable can lead to internal wire breaks. If your keyboard has a detachable cable, ensure the port stays clean and free of lint. By treating the device with a bit of respect, you ensure that the premium typing experience stays consistent for years to come.
Conclusion
Maintaining a mechanical keyboard might seem like a chore, but it is a rewarding ritual for anyone who appreciates quality hardware. By following a simple routine of light dusting, occasional deep cleaning, and careful usage, you protect both your financial investment and your daily comfort. A clean keyboard isn't just about aesthetics—it’s about the tactile joy of a perfect keystroke every single time you sit down to work or play. Take care of your board, and it will undoubtedly take care of you.
Frequently Asked Questions
How often should I perform a deep clean versus a light dusting?
You should perform a quick surface dusting once a week to prevent particles from settling into the switches. Plan for a full deep clean by removing all keycaps every three to six months depending on your environment. If you frequently eat at your desk or own pets, you might need to do this more often to keep the board functional.
Is it safe to use high pressure compressed air directly on the switches?
Compressed air is great for clearing loose debris from the plate, but you must avoid holding the nozzle too close to the switches. High pressure can force dust deeper into the switch housing or even dislodge small internal components. Use short bursts from a safe distance to clear the surface without risking the delicate mechanics inside.
When should I consider lubing my switches instead of just cleaning them?
If your keys feel scratchy or make a metallic pinging sound after a thorough cleaning, you should consider applying new lubricant. Cleaning removes external dirt, but lubricant reduces the physical friction between the moving parts of the switch itself. This process takes more time but it will significantly improve the typing feel and sound of an aging keyboard.
Can I wash my keycaps in a dishwasher to save time?
You should never put your keycaps in a dishwasher because the intense heat can warp the plastic and destroy the fit. Instead, soak them in a bowl of warm water mixed with a few drops of mild dish soap for twenty minutes. Use a soft brush to gently scrub away skin oils and let them air dry completely before reassembling the board.
What is the best way to remove a sticky spill without damaging the electronics?
You must unplug the keyboard immediately and remove the keycaps to access the area around the switches. Use a cotton swab dipped in high percentage isopropyl alcohol to gently dissolve and wipe away any sticky residue on the plate. If the liquid reached the internal circuitry, you may need to replace the individual switch to ensure the device remains safe to use.