





How to Set Up Snowboard Bindings: Width, Angles & Position
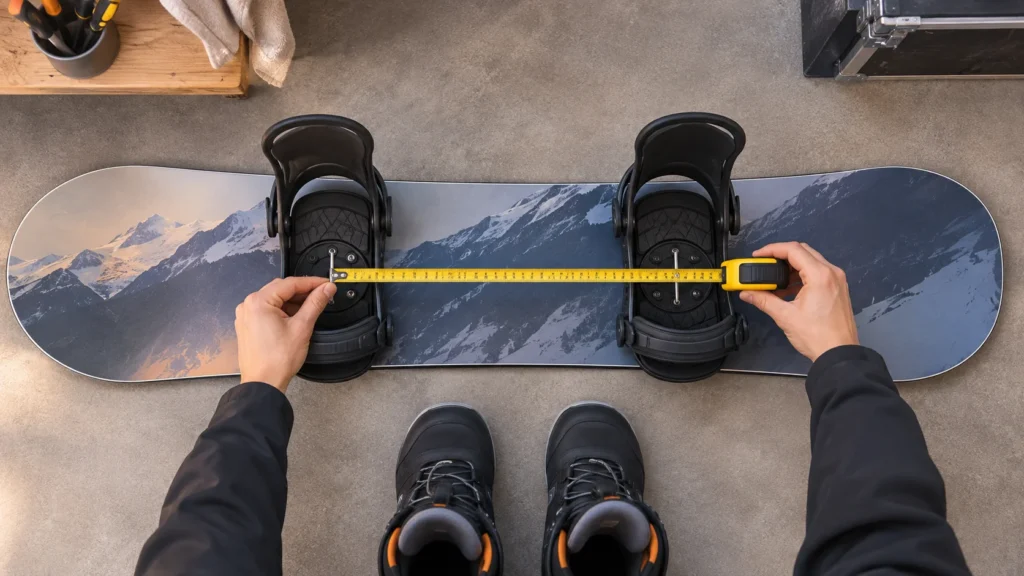
A comfortable snowboard stance is a starting point you can check and refine—not a single set of numbers that suits every rider. Begin with your board’s reference stance and the binding maker’s instructions, then confirm that your boots sit securely, your stance feels balanced and your bindings are mounted correctly. Make one adjustment at a time so you can tell what changed.
Check your gear and riding direction
Before choosing a width or angle, confirm that the bindings fit your boots and attach to your board’s mounting system. Mounting patterns vary; the evo setup guide describes common insert patterns and the Burton Channel system, and notes that compatible discs or hardware depend on the equipment. Use the instructions for your exact bindings and board rather than assuming that similar-looking parts are interchangeable. If you cannot confirm compatibility, ask the manufacturer or a snowboard shop before mounting.
Work out which end of the board is the nose and which is the tail, then choose your lead foot: regular means left foot forward; goofy means right foot forward. If you are unsure, try a comfortable standing position and treat any quick test as a clue, not a definitive answer. You can change direction later if riding feels more natural the other way.
Lay the board on a stable surface. Gather your snowboard boots, bindings, a tape measure and the correct hand tool for the supplied hardware. Do not substitute screws or washers from another binding system. Follow the manufacturer’s mounting and tightening instructions; do not guess at a torque value.
Set a starting stance width
Look for the reference stance marked on the board or described in its manual. It is a practical first setting, not a mandatory position. If you do not have a clear reference, stand comfortably with your feet a little wider than shoulder width, then measure from the center of one foot to the center of the other. That gives you a rough starting width to compare with the board’s available insert positions.
Set the bindings so the distance between their centers is close to that starting measurement. On a board with separate insert sets, make sure the front and rear positions are sensibly balanced around the board’s reference marks. The available holes may not match your preferred measurement exactly; choose the nearest workable position rather than forcing hardware into a misaligned hole. On a Channel board, position the bindings according to that board and binding system’s instructions.
Width is personal. A stance that feels too wide may make movement feel restricted; one that feels too narrow may feel less stable. Those are cues to reassess, not universal diagnoses. Adjust in small increments and check that both bindings remain securely attached and that the stance still suits the board.
Choose and check binding angles
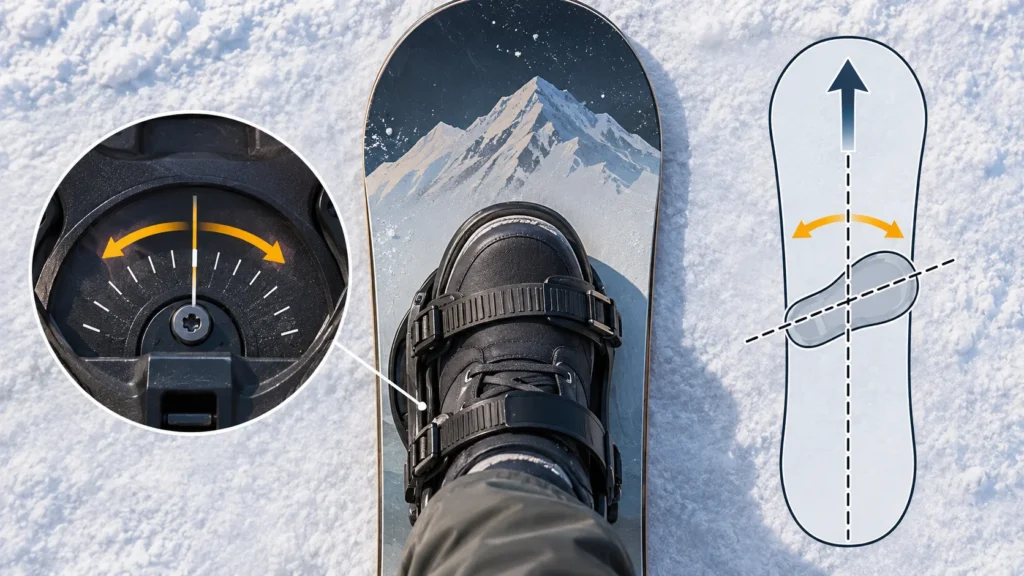
Read the angle markings on the binding and identify which direction is positive. A positive angle points the toes toward the nose; a negative angle points them toward the tail. As a starting point, the evo guide suggests a front angle in the +15° to +21° range, with the rear angle chosen according to preference and riding. A rear foot angled slightly toward the tail is often called a duck stance; a neutral or positive rear angle is another option. These are starting choices, not rules.
Set the front binding to point toward the nose, then choose a rear angle that lets you stand comfortably and suits how you expect to ride. Riders who want to ride switch may prefer to experiment with a rear angle that mirrors the front more closely, while other riders may find a less open stance more comfortable. Board shape and personal mobility can affect what feels natural. Change angles gradually rather than copying another rider’s setup.
For an example of why a single “correct” stance is misleading, Burton’s rider profiles list different stances, including different lead feet, widths and angles. Those are examples of individual setups, not recommendations for another person or a guarantee of comfort.
Position bindings and center your boots
Once width and angles are roughly set, position the bindings for your chosen riding direction. Use the board’s reference marks and instructions to understand whether its intended stance is centered or set back; do not assume every board should have bindings centered between nose and tail. For a directional board, follow its model-specific guidance. For a twin board, use its reference stance as the initial guide.
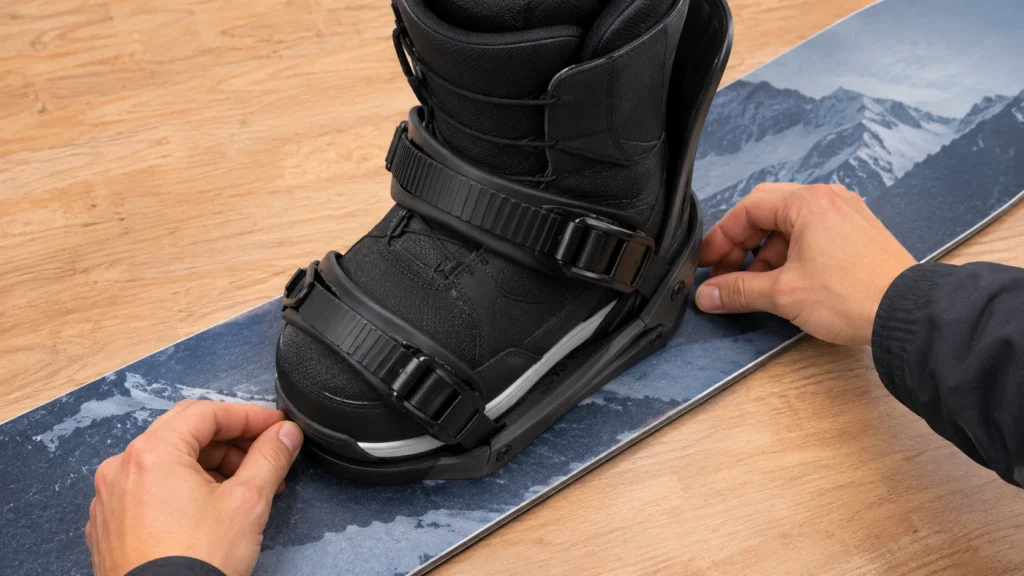
Before fully tightening the hardware, place each boot in its binding and check how it sits over the board. Aim for a balanced amount of boot overhang at the toe and heel edges rather than a pronounced imbalance. Excessive overhang can be a reason to check boot centering, binding adjustments or board width, but the right assessment depends on your board, boot and binding. Do not alter the board or force a fit to correct it.
Check that the straps close comfortably over the boot and that the boot is held securely. Binding designs differ, so use the binding manual to adjust strap position, heelcup or footbed. Also confirm that the highbacks and other parts are oriented as the manufacturer intends. Make these adjustments with the boots you will actually ride, not a different pair.
Tighten and test before riding
With the boots buckled into the bindings, stand on the board on a flat, clear surface. Check that your feet point in the intended directions, your knees can bend comfortably and your weight feels balanced. Look again at stance width and boot overhang. If something feels awkward, loosen the bindings and change one setting—width, angle or position—then repeat the check. Comfort varies, and a static check cannot predict exactly how a setup will feel while riding.
When the setup looks and feels right, tighten the supplied hardware as directed by the manufacturer. Recheck that each binding is secure and the straps hold the boots properly. Before riding, inspect the hardware and bindings again. If a part is damaged, the fit is uncertain or anything will not tighten correctly, do not ride until the issue is resolved. A qualified shop can help when compatibility or adjustments are unclear.
Keep a note of your starting width and angles. If you later change the setup, change one variable at a time and compare how it feels in appropriate conditions. This is a practical way to learn your preferences without treating a borrowed setup or a generic angle range as a prescription.
Choose a board that supports your setup
Binding positions are limited by a board’s inserts or mounting system, so consider the intended riding direction and usable stance range when selecting a board. For broader help comparing board styles and options, see TheTopZone’s snowboard Top Picks. Check the exact board’s own instructions for its reference stance and mounting details; this guide’s general process does not replace model-specific directions.