





How to Set Up and Maintain an Outdoor Fountain
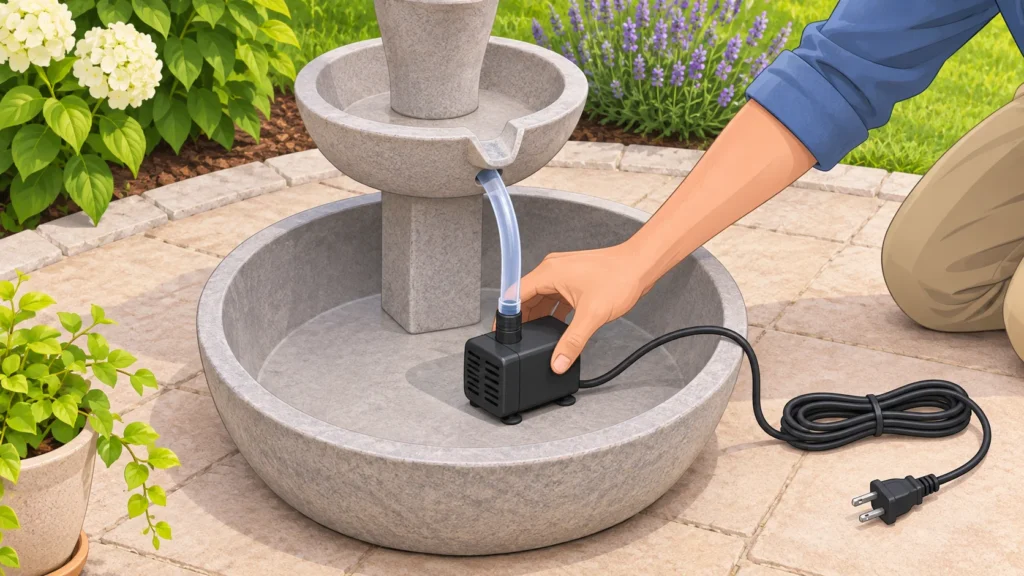
A reliable fountain setup starts with the instructions for your exact model—not a one-size-fits-all assembly recipe. Basin style, pump placement, power source and winter storage needs vary. Use this guide to plan the first fill, establish a simple care routine and shut the fountain down safely when freezing weather is expected. If you are still choosing a style or configuration, browse the outdoor fountain Top Picks first.
Before you assemble: check the model and location
Unpack the fountain and identify the basin or reservoir, pump, tubing, fittings and any separate power supply or solar panel. Read the assembly and safety instructions before connecting anything. Confirm that the intended surface is stable and that the fountain can be placed where its power source and cable can be used as instructed. Keep plugs and connections protected from water as the manual specifies.
Do not assume all fountains use the same pump arrangement. Some are self-contained; others have a separate panel or components that need to be positioned independently. For a solar bird-bath pump, the supplied source describes a detachable-panel design that lets the pump and panel sit in different locations; that is a feature of that design, not a rule for every solar fountain. Follow your model’s directions for panel placement and cable routing. The solar fountain guide also notes that direct-sun performance varies with the product type.
Assemble and start the fountain
- Fit the parts in order. Assemble the basin, supports, tubing and decorative pieces as shown in the manual. Avoid forcing a fitting or pulling a component by its cable. Check that the pump inlet and outlet are not blocked by packing material or debris.
- Place the pump and route the tube. Use the model’s stated orientation and connection points. Keep tubing from kinking or being pinched between parts. If the design includes a pump cover or access panel, make sure it can still be opened for cleaning.
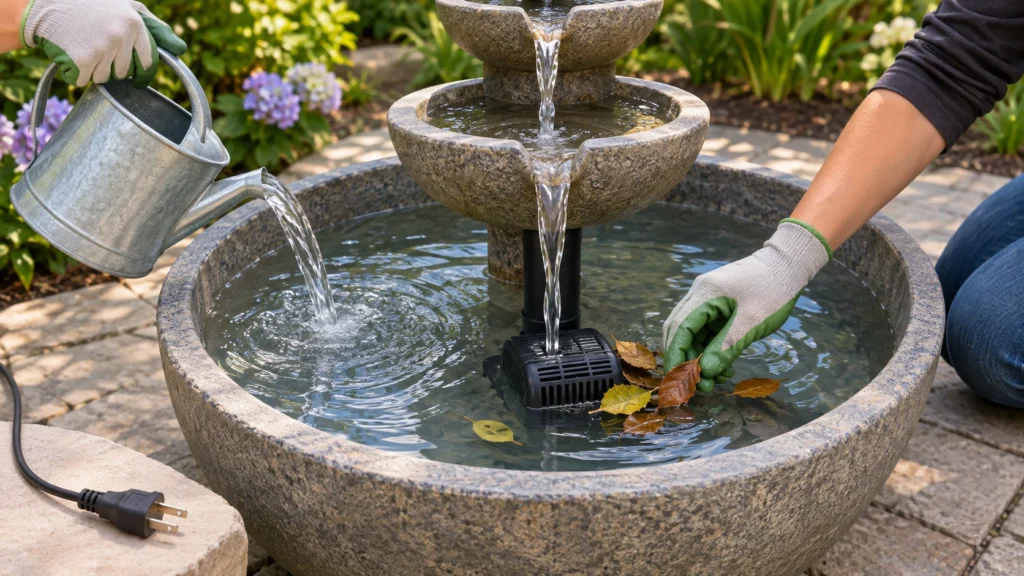
- Fill before powering on. Add water to the level recommended by the manufacturer. A submersible pump needs water around it while operating; do not run it dry unless the manual explicitly says the model is designed for that. The source on routine fountain care likewise warns owners to keep a submerged pump covered by water and to check for water lost through evaporation. Read its pump and water-level guidance, while treating the fountain’s own manual as the authority for your unit.
- Make the first test. Connect power only as instructed and watch the fountain through a complete operating check. Look for water returning to the reservoir, leaks at joints and splashing that carries water outside the basin. Switch off and disconnect power before adjusting the pump, tubing or fittings.
- Settle the flow. Adjust the outlet or flow control only if the manual provides for it. If water is overshooting the basin, reduce the flow or reposition the outlet as the instructions allow. Refill to the specified level after checking for splash-out.
Illustrative example: You have a solar pump whose panel is connected to the pump by a cable, and the basin will sit in shade. Before assembly, check whether that exact model permits separate panel placement and how long its cable is. If it does, position the panel where its manual allows and route the cable without tension; if it does not, choose a location that meets its stated light requirements or reconsider the setup. Do not assume a battery, detachable panel or cloudy-weather operation unless the model documentation confirms it.
Build a simple water and pump routine
Fountains lose water through evaporation and splash-out. Check the level regularly—more often during hot, dry or windy spells—and top up according to the manual. If you have to refill unusually often, inspect the basin and connections for water escaping rather than assuming evaporation is the only cause. Keep the pump submerged to its required level while it is running.
Remove leaves and other loose debris before they collect around the intake. When flow weakens, makes an unusual sound or stops, switch off and unplug the fountain before inspecting it. If the pump is designed to be removed, follow the manual to take it out and clean the intake and accessible parts. Avoid opening sealed components or using tools and cleaners the manufacturer does not permit. The routine-care source recommends disconnecting power before removing the pump and using gentle cleaning rather than harsh chemicals; use that as general caution, not as a substitute for the specific instructions for your fountain. Its maintenance discussion is here.
When cleaning the basin, remove debris and use a soft cloth or brush if the material’s instructions allow it. Rinse away loosened dirt, and avoid letting cleaning residue enter the pump. Water chemistry and suitable cleaners depend on the fountain material and any plants or animals that may use the water; do not add treatments unless they are approved for your particular setup. If visible deposits return quickly, review the maker’s advice for your water source and material rather than relying on a universal remedy.
When operation changes
- Weak or no flow: Disconnect power first. Check the water level, pump intake, tubing for kinks and fittings for blockages. Clean only the parts the manual permits, then refill before restarting.
- Water splashes out: Check that the fountain is level, the outlet is aligned over the basin and the water level matches the specified range. Reduce flow only if the model provides an adjustment.
- Water level keeps falling: Top up and observe where water lands. Splash-out, evaporation and a leak are different possibilities; inspect joints and the basin for evidence before deciding what needs repair.
- Solar pump stops: Check the model’s requirements for sunlight, battery charging and operation. A solar-direct pump may behave differently from a battery-backed one; do not diagnose it using another model’s specifications.
Do not handle a powered pump in water. If a cable, plug or housing appears damaged, stop using the fountain and consult the manufacturer or a qualified repair service rather than improvising an electrical repair.

Prepare for freezing weather
Use local conditions and the manual—not a fixed month—as your cue. If freezing weather is expected, check whether the manufacturer requires seasonal shutdown. For a small fountain that is not intended to run in freezing conditions, disconnect power before touching the pump or water, drain the reservoir and other bowls, and check for water trapped in tubing, pump chambers or low points. Water left in enclosed parts can freeze and expand; the winterizing source emphasizes that an apparently empty basin may still have water in hidden areas. See its step-by-step winterization overview.
If the pump is removable, clean and store it in the way its own instructions specify. Pump storage requirements can differ, so do not assume it should always be stored wet or dry. Let drained parts shed residual water, then store a portable fountain in a protected, frost-free place when the manufacturer recommends it and moving it is safe. For a fountain that must stay outdoors, drain it thoroughly and use a cover only if appropriate for its construction. Check that rain or melting snow does not collect in the basin or cover.
These steps are not a substitute for instructions for large ponds, professionally installed features, or fountains designed to operate through winter. Such systems may have different pumps, plumbing and shutdown procedures. If the manual gives a temperature limit or a specific winter procedure, follow it over general advice.
Restart after storage
Before refilling, inspect the basin, tubing, fittings and pump for visible damage or debris. Reassemble using the manual, fill to the specified level, and check that water circulates without leaking or splashing out. Keep the first restart under observation so you can correct the water level or flow safely. If a part is cracked, a connection will not seal, or the pump does not operate after basic permitted checks, leave the fountain off and contact the manufacturer.