





How to Fit and Adjust a Snow Sport Helmet
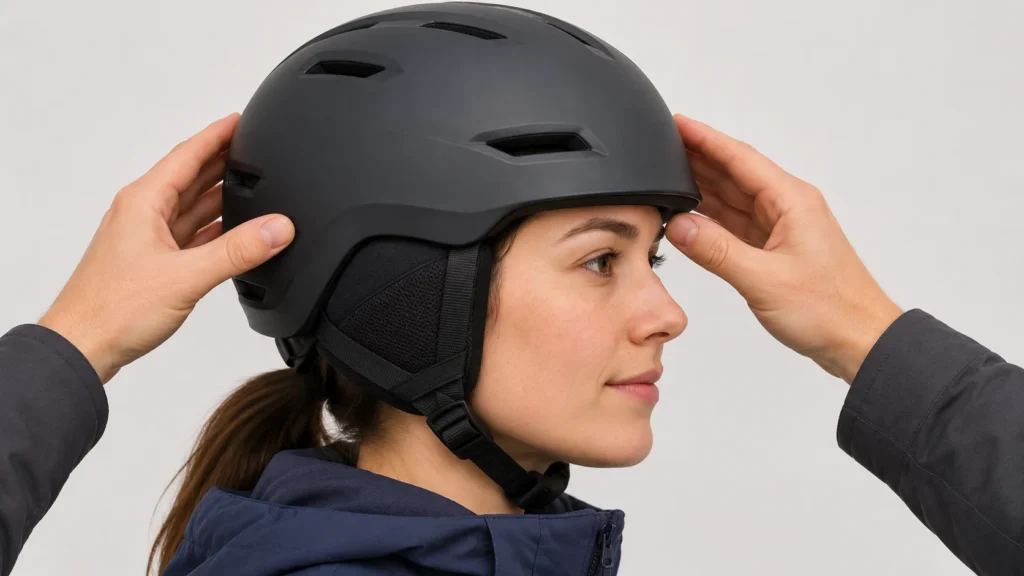
A helmet can match the number on a size chart and still feel wrong on your head. The useful question is not simply whether it fastens, but whether it sits in the intended position, stays put when you move, and feels evenly snug rather than painfully tight. Use the process below before heading onto the snow, and recheck the fit if you change what you wear underneath or alter removable parts.
Start with the sizing and fit instructions for the exact helmet. Adjustment range and strap arrangement differ by model, so do not assume that a dial or strap can make an incorrectly sized helmet fit. Our snow sport helmet Top Picks guide can help you choose a model; this guide focuses on checking and adjusting the one you have.
Start with size, not the adjustment dial
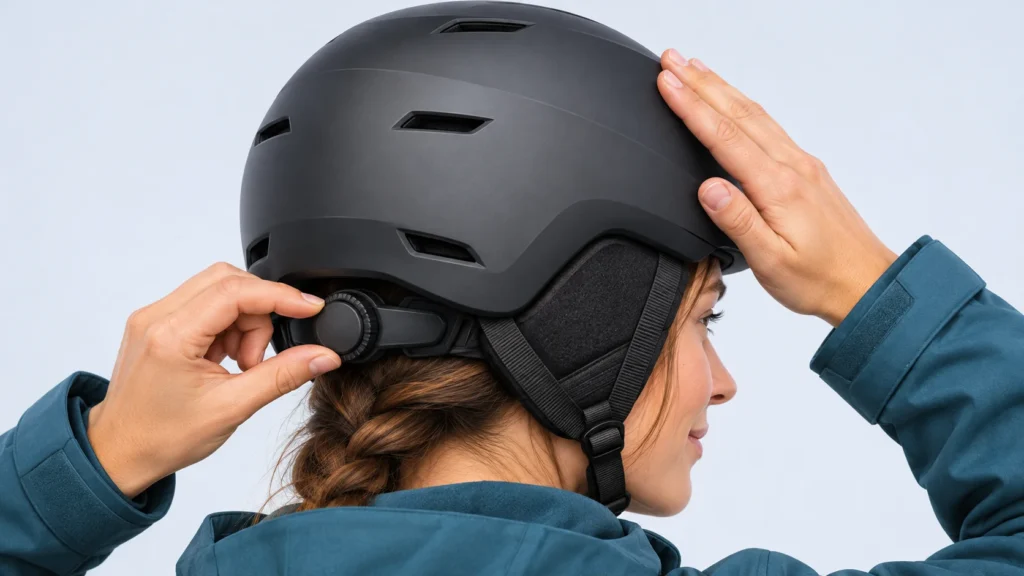
Follow the helmet maker’s sizing chart and measurement instructions. If you are between sizes, or the helmet’s shape does not match your head comfortably, try another size or model rather than relying on the adjustment system to compensate. A rear dial or other fit mechanism fine-tunes a helmet within its intended range; it is not a substitute for choosing a suitable size.
Try the helmet with the items you expect to wear underneath it. A thick hat or folded-up fabric can change how the helmet sits and may create uneven pressure. Do not buy a helmet for a child to grow into: Mountain Creek’s snow-sport safety guidance advises that a child’s helmet fit correctly and securely, rather than being oversized for future growth.
Before adjusting anything, loosen the fit system enough to put the helmet on without forcing it. Place it on your head, then settle it into position. If you cannot get it into a comfortable position within the maker’s fit range, stop and reconsider the size or shape instead of tightening harder. Do not remove padding or other parts to make a helmet feel larger unless the manufacturer’s instructions specifically allow it.
Check position and stability
Look straight ahead and check that the helmet sits level rather than tipped far back or pulled down over your eyes. Its front should not obstruct your view. Use the maker’s instructions for the correct position for that specific model; the available sources do not establish one universal measurement or alignment rule for every helmet.
With the helmet in place, tighten the adjustment system gradually. It should feel secure around your head, with contact that is reasonably even—not a single sharp pressure point. Then, using your hands, gently try to move the helmet forward, backward and side to side. Notice whether the shell shifts substantially, exposes a gap, or makes you move the helmet out of its proper position to feel comfortable.
If it moves too freely, tighten the fit system a little and repeat the check. If tightening creates pain or a concentrated pressure point, loosen it and reassess the size and shape. A secure fit is not the same as maximum tightness. Mountain Creek’s safety guidance emphasizes that a snow-sport helmet should fit correctly and securely; this hands-on check is a practical screening step, not a laboratory test or a guarantee of protection.
Illustrative example: when a dial is not the answer
Imagine a helmet that feels loose at the sides but presses painfully at the forehead when you tighten its rear dial. The dial has not solved the mismatch; it has made the pressure point worse. Loosen it, check that the helmet is positioned as the maker directs, and try another size or shape if the uneven fit remains. This is a qualitative example, not a claim about any particular model’s fit.
Adjust the straps and buckle
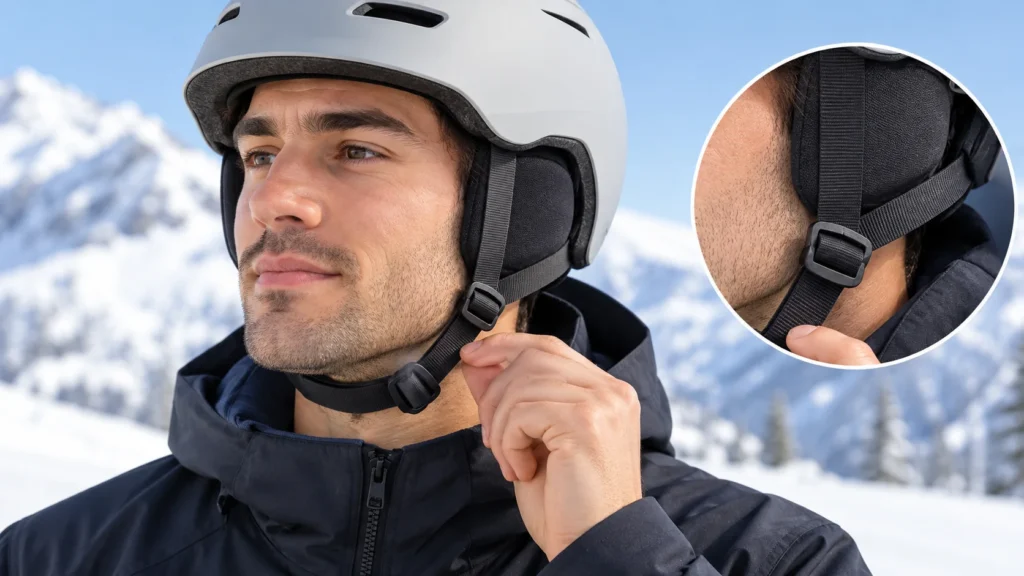
Once the helmet itself sits comfortably and stays in position, adjust the strap system according to the manufacturer’s instructions. Arrange the straps so they lie flat and are not twisted. Fasten the buckle and check that it closes securely. The chin strap should be comfortably snug: it should not hang loose, but it should not cause pain or make swallowing uncomfortable. Make strap adjustments in small increments, then recheck the helmet’s position rather than judging the straps in isolation.
Check that the straps meet around your ears as the maker intends, and that padding or removable ear pieces have not been displaced. Strap geometry varies between models, so follow the model’s manual rather than copying a different helmet’s setup. If the buckle will not close correctly, a strap is damaged, or the correct arrangement is unclear, do not improvise; consult the maker or a knowledgeable retailer.
For children, repeat the fit check as they grow or whenever the helmet’s fit changes. A helmet that once fit securely can become too small. Do not solve that by removing parts or changing the strap arrangement unless the manufacturer specifically allows it. A child should not wear a loose helmet intended to last through future growth.
Recheck after changes
After any adjustment, repeat the position, movement and strap checks. Then take the helmet off and put it on again to see whether you can reproduce the same comfortable, secure fit. If you wear goggles, check that the combination works without forcing the helmet out of position. If the helmet shifts when you put on or remove the goggles, adjust the setup or seek a compatible alternative rather than accepting a loose fit.
Adjustment features are model-specific. For example, the FCCJ roundup describes the uvex Wanted visor helmet as having IAS circumference adjustment and FAS webbing. That description identifies features of that listed model; it does not establish that every helmet has the same controls or adjustment range. Use the instructions for the exact model in front of you.
When the fit still is not right
Stop trying to adjust the helmet if you cannot get a stable, comfortable position, if a pressure point persists, or if a gap remains despite correct use of the fit system. Try a different size or model, or ask a knowledgeable retailer to help you check the fit. A chart can narrow the choice, but it cannot tell you exactly how a particular helmet will feel on your head.
Revisit the fit if you change what you wear under the helmet, alter removable components, or notice new movement or discomfort. Do not treat a snug setting as proof that the size is correct, and do not assume that more tightening is always better. Individual head shapes and preferences vary, so a setting that feels comfortable to one person may not work for another. The practical goal is a correctly positioned helmet that feels evenly secure, with straps arranged and fastened as its maker directs. If the helmet cannot meet that goal without discomfort or improvised changes, choose another fit rather than forcing this one.