





How to Set Up and Position a Baby Monitor Safely
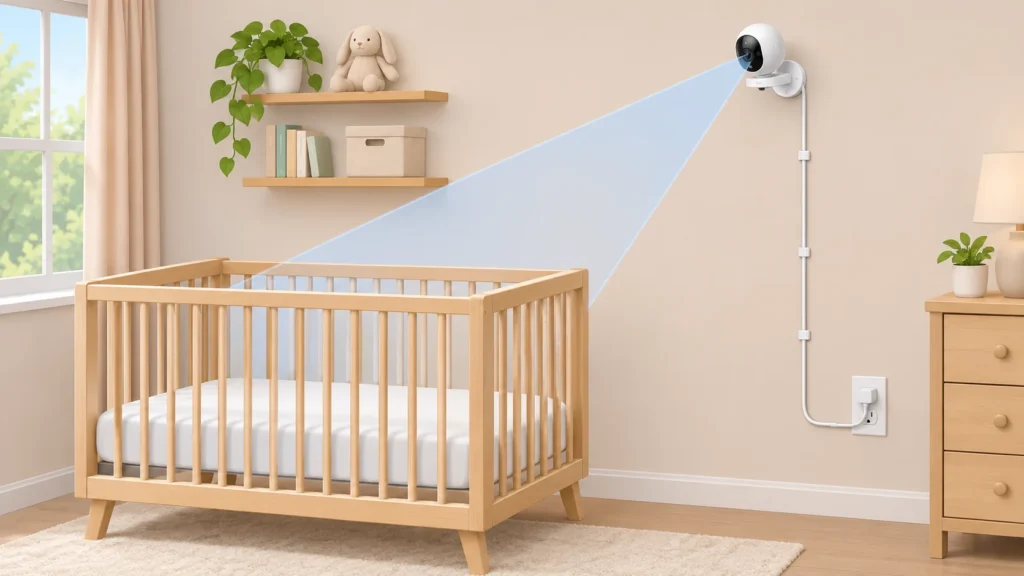
A baby monitor is only useful if its camera can show the area you want to see, its connection works from where you’ll use the parent unit, and its setup keeps equipment and cords away from the baby’s sleep space. Placement varies with the room, the monitor and its manual, so treat general distance suggestions as a starting point—not a rule for every model. This guide walks through a practical setup and a final check. For help choosing a monitor type or features, see TheTopZone’s baby monitor Top Picks.
Start with the room and the manual
Before plugging anything in, identify the crib or bassinet and the places caregivers are likely to use the parent unit. Read the setup and safety instructions for your exact model: mounting methods, power requirements, pairing steps and camera controls differ. Don’t assume advice for one monitor applies to another.
Choose a camera location that gives a clear view of the intended sleep area without placing the device over the baby. A diagonal view from a stable location outside the sleep space can help you see more of the area than a camera aimed straight at one edge. Keep the camera, mount and any loose accessories outside the baby’s reach. The Willo setup article suggests placing a camera away from the crib rather than directly above it; follow your manufacturer’s instructions if they specify a different safe mounting arrangement.
Look at the whole route between outlet and camera, not just the camera’s final position. Don’t route a cord across or into the sleep space, where it could be reached, pulled or caught. Keep cords secured and out of reach, and don’t leave a device or cord hanging above the baby. If the supplied cable cannot reach a suitable outlet without passing through an unsafe area, choose a different approved location rather than improvising a cable extension or mounting arrangement. Willo also gives a general placement suggestion of about 3–6 feet from the crib, but that distance is not a universal manufacturer specification; use it only as a starting point when it fits your model’s instructions and room layout.
Position for a useful view
Start with the camera at a position allowed by its manual, then aim it at the area you want to observe. Check whether the view includes the intended sleep area without being blocked by crib rails, furniture, curtains or decorations. A high position may widen the view, but don’t create a hazard by balancing a camera on furniture or using an unapproved mount. Make any adjustment from outside the crib; don’t lean equipment over the baby.
Test the image in the lighting conditions when you expect to use the monitor. If the room will be dark, check the camera’s night-view setting. If the image is washed out, obscured or difficult to interpret, adjust the angle or distance according to the manual. Avoid assuming that a wide-angle image makes every part of the scene easy to see. If your camera has pan, tilt or zoom, confirm that its controls work from the parent unit or app; if it doesn’t, reposition the camera by hand only as the manufacturer allows.
Illustrative example: A caregiver finds that a camera on a dresser shows the crib’s near side but leaves part of the sleep area behind a rail. Rather than moving the crib or placing the camera over it, they check the manual, move the camera to an approved stable location off to the side, and view the image again from the parent unit. If the new angle still leaves an obstruction, they try another allowed position. The right choice depends on the actual room and device—not a fixed height or distance.
Place power and the parent unit
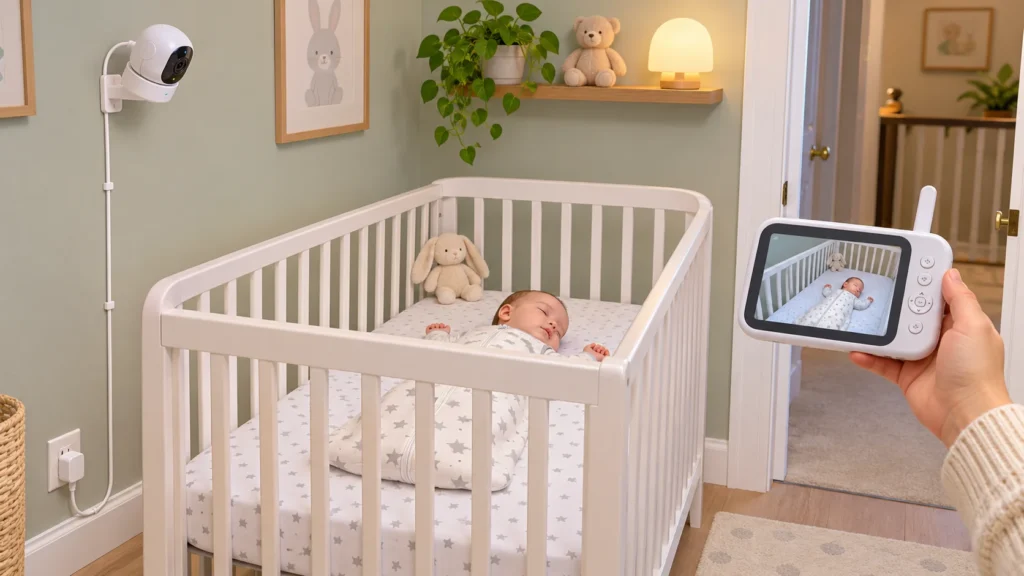
Follow the model’s instructions for powering the camera and charging or powering the parent unit. Use the supplied or manufacturer-approved power accessories and connect them as directed. A camera that needs to be plugged in should be placed where its power lead can reach an outlet without creating a reachable loop or crossing the baby’s sleep space. The supplied cord length and approved mounting options determine what locations are practical.
The parent unit should be somewhere caregivers can use it, with its own charging lead managed so it does not create a trip or pull hazard. If you use a phone app instead of a separate screen, check that the phone is set up and available where you need to receive the monitor’s notifications. Don’t assume a monitor works the same way on battery, local connection or Wi-Fi: consult the exact model’s instructions for its power and connection modes.
Some monitor makers describe setup as straightforward, but that does not remove the need to check the specific instructions. For example, Momcozy’s non-Wi-Fi monitor collection page says its monitors connect directly between camera and monitor unit and describes plugging in the camera. That describes products in that collection, not every baby monitor. Use your own model’s manual for the actual power and pairing steps.
Check the connection and image
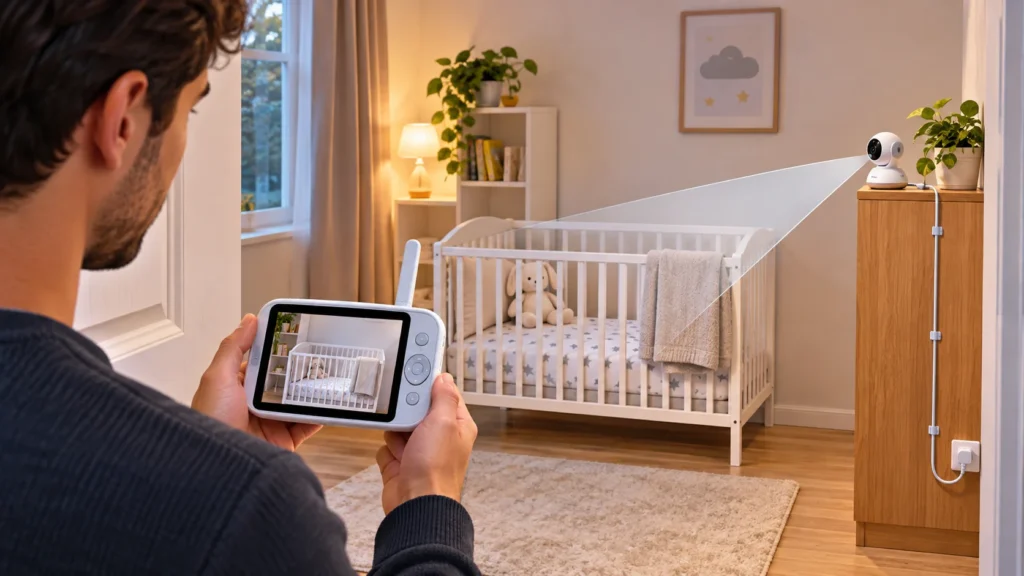
Pair the camera and parent unit or configure the app according to the manual. Then carry the parent unit to the places where you expect to use it, including any room or floor where you need a signal. Check the live picture and sound at each location. Walls, distance and the monitor’s connection type can affect whether the view remains available, so a successful check beside the camera alone is not enough.
If the picture or sound drops, first check that both units have power and are paired as instructed. Then try moving the parent unit or camera to another approved position and test again. For an internet-connected monitor, check the model’s setup instructions and the connection it requires; don’t assume that a strong signal in one spot guarantees a reliable connection everywhere. If the problem continues, use the manufacturer’s troubleshooting guidance rather than relying on a general range figure from another model.
Before you finish, watch the live view while the room is in its usual nap or bedtime arrangement. Confirm that the camera remains stable, the intended area is visible, and curtains, bedding or other objects have not shifted into the view. If someone else will use the monitor, show them how to check the image and hear the audio, and where the power and connection instructions are kept.
Do a final pre-use review
- View: The camera shows the intended sleep area, and the picture is usable in the room’s expected lighting.
- Position: The camera and mount are stable, placed as the manual allows, and outside the baby’s reach.
- Cords: Power leads are secured and routed away from the sleep space and out of reach; nothing hangs over the baby.
- Power and connection: Camera and parent unit have power, pairing is complete, and the live feed works where caregivers will use it.
If any item fails, correct the setup and check it again before relying on the monitor. A monitor provides a view or sound feed; it does not make an unsafe placement safe, and a clear image does not confirm every aspect of a baby’s wellbeing. Recheck the arrangement if you move the crib, camera, furniture or power source. For model-specific mounting, power or connection questions, the manufacturer’s manual is the deciding reference.