





How to Mount a Fish-Finder Transducer for Clear Readings
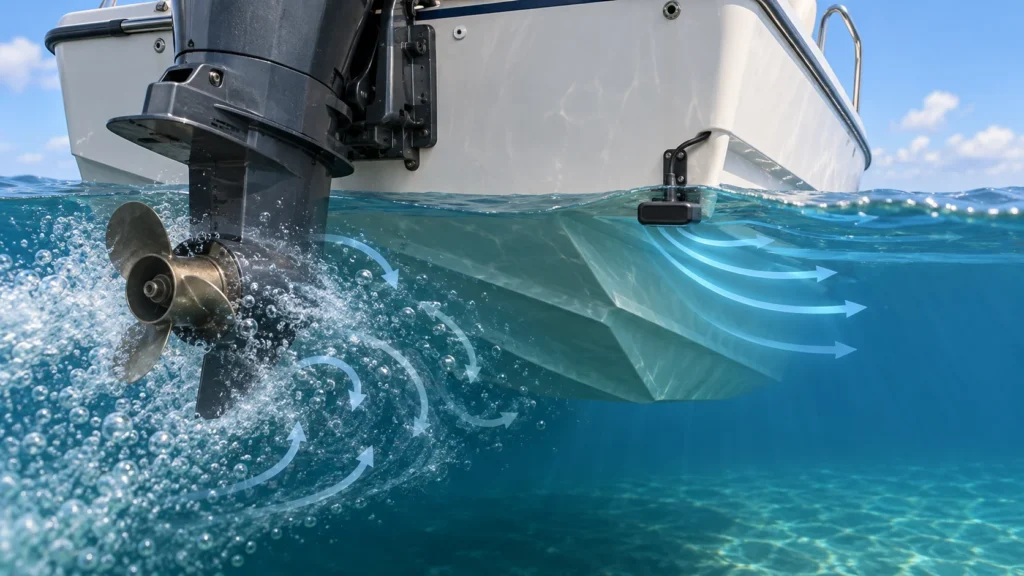
A fish finder can show a clear picture at the dock and lose its bottom reading once the boat moves. Often, the issue is not the display: the transducer may be sitting in aerated, turbulent water, or its position or angle may need adjustment. The right installation depends on the hull, transducer and how you use the boat, so treat general placement advice as a starting point—not a substitute for the instructions for your exact model.
This guide focuses mainly on transom-mounted transducers, a common setup covered by the installation sources below. Trolling-motor, in-hull and through-hull installations have different constraints. If you are still choosing electronics, compare options in TheTopZone’s fish-finder Top Picks, then check the selected unit’s manual and compatibility information before buying mounting hardware or drilling.
Choose a mount that fits the boat
Start by identifying the mounting style your hull and transducer support. A transom mount attaches outside the stern; a trolling-motor mount moves with the motor; and through-hull or in-hull arrangements require different hull-specific decisions. These approaches are not interchangeable. The Reyco Marine installation guide describes transom and trolling-motor mounts as common DIY options, while warning that through-hull work is more consequential because it involves a hull penetration. That is general guidance, not approval for a particular boat.
For a transom installation, inspect the hull from behind and below. The transducer needs a path through relatively smooth, solid water—not bubbles and turbulence shed by the propeller, hull steps, strakes or other fittings. The MotoMember installation overview summarizes manufacturer guidance to avoid disturbed flow and the propeller path. Reel & Rig’s placement guide also identifies strakes, rivets and fittings as potential sources of turbulence. On an aluminum hull, ribs and rivets can complicate the search for a clean-flow location.
Leave room to adjust and inspect the transducer, and check that its position will not conflict with trailer bunks, rollers or other parts of the boat. Do not assume a suggested side or distance will suit every hull. Look for the mounting diagram and clearances for your exact transducer, and consult the boat manufacturer or an installer if the location is uncertain.
Set height and alignment
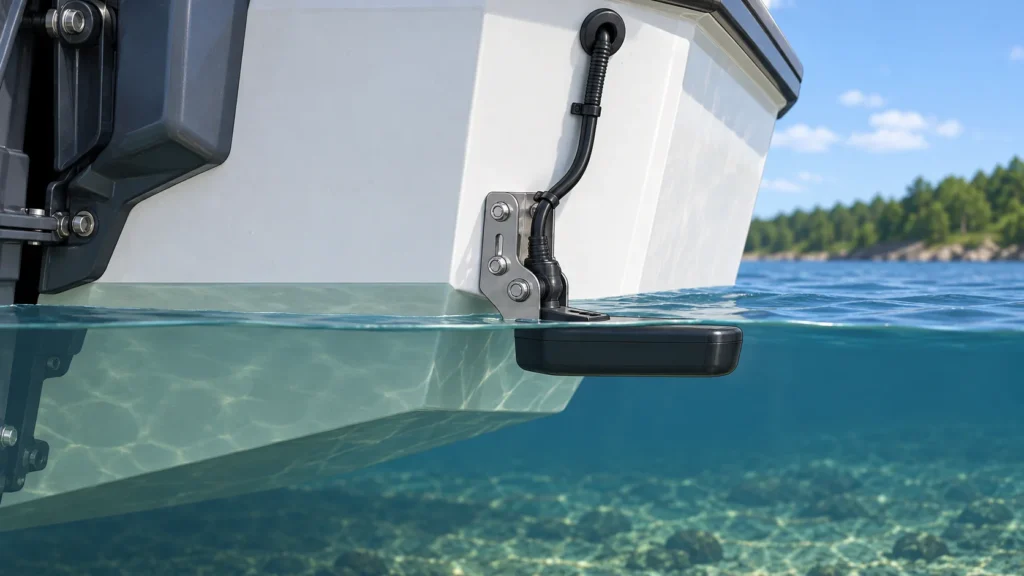
The transducer face needs to meet the water properly as the boat moves. If mounted too high, it may lose contact with clean water; too low, it may be more exposed to impact, drag or spray. The bracket’s adjustment range can help find a workable position, but there is no single height or angle that fits every hull and model.
As a starting point for a transom mount, keep the face aligned with the water surface when the boat is running in its usual attitude. A boat sitting at the dock may sit differently from one on plane, so a static view alone cannot confirm the final angle. The Reyco Marine guide notes that position and angle may need checking on the water. Use your manufacturer’s instructions for the specified starting position and adjustment method; do not copy measurements from a different transducer or boat.
Illustrative example: Suppose a transom-mounted unit gives a steady bottom reading while stationary but drops out when you accelerate. That pattern makes water flow and transducer position sensible first checks, rather than an immediate reason to replace the display. Make one small adjustment at a time, then repeat the same on-water check. If moving or lowering it does not help, return to the model-specific installation guidance or get the installation assessed.
Route the cable with care
Plan the cable path before drilling or securing anything permanently. Keep the cable protected from sharp edges, heat, pinching points and moving steering or throttle components. Avoid running it tightly alongside electrical wiring where practical: both Reyco Marine and Reel & Rig identify nearby electrical runs as a potential source of interference. Keep any required separation and routing details consistent with the transducer and display manuals.
Do not shorten or splice a transducer cable unless the manufacturer explicitly permits that procedure for the exact model. Reel & Rig advises coiling and securing excess cable rather than cutting it, because the cable is part of the sonar system. Use the supplied routing and connector instructions; do not assume that a technique suitable for one product applies to another.
For power wiring, follow the display manufacturer’s wiring diagram, including its specified fuse and power source. The Reel & Rig guide recommends a direct battery connection for the units it discusses, but that is not a universal wiring instruction for every boat or fish finder. If you see speckling or bands, check the manual’s troubleshooting advice and inspect power connections and cable routing before changing multiple things at once.
Test before making it permanent
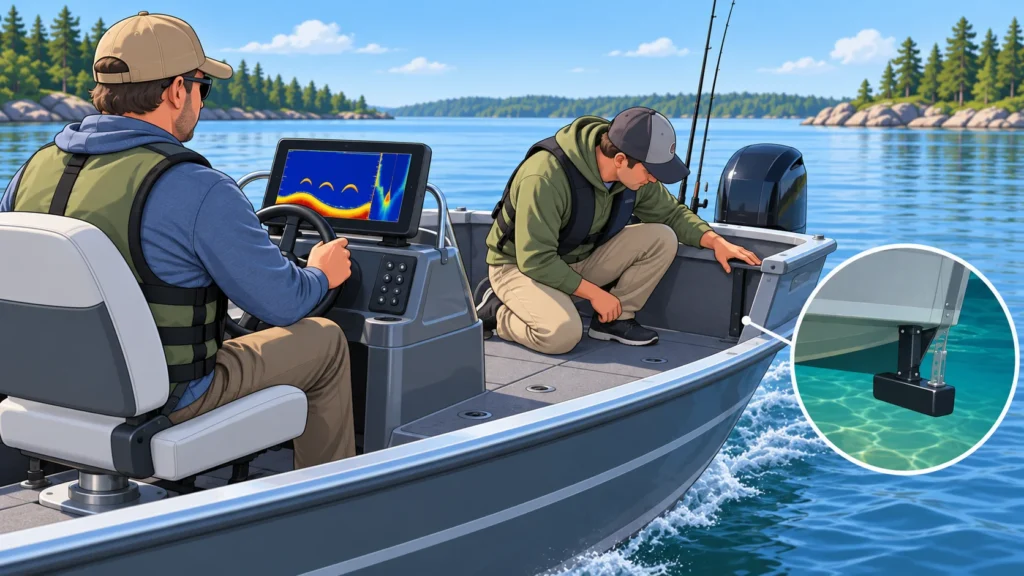
When the model’s instructions allow a temporary test, check the proposed position before committing to a permanent installation. Reel & Rig’s guide describes temporarily holding a transducer in the candidate position and checking readings at rest, trolling speed and cruising speed before drilling. Follow the exact model’s instructions on safe temporary mounting and water testing; a loose transducer or unsecured cable must not create a hazard.
Look for a consistent bottom return under the conditions in which you need the fish finder to work. If the picture breaks up only as speed increases, disturbed water is one possibility. If readings are noisy across conditions, inspect the cable route and power connections as well. Weed or debris on the transducer face, a damaged cable, incompatible components or settings may also need investigation; do not treat any one symptom as proof of a single fault.
- Reading drops out at speed: Check whether the transducer is losing clean water flow; adjust only as directed by the model’s installation instructions. Reel & Rig’s troubleshooting guide identifies aerated water as one possible cause.
- Screen shows speckle or bands: Inspect cable routing and power connections for possible electrical interference, following the manufacturer’s wiring guidance. Reyco Marine discusses separation from noisy wiring.
- Depth reading seems inconsistent: Check the transducer face for debris and verify its alignment and installation against the exact model’s manual; these are possible checks, not a diagnosis. Reel & Rig lists angle and weed among potential causes.
Know when to stop and get help
Through-hull installations deserve particular care because they involve penetrating the hull. Before proceeding, establish that the proposed location, hull material and fitting are appropriate using the boat and transducer manufacturers’ documentation. If you are unsure about hull construction, sealing, nearby wiring or fuel-system locations, ask a qualified marine installer rather than guessing. Reyco Marine urges caution with through-hull work and recommends professional help when the hull or drilling location is uncertain.
In-hull mounting is not a universal workaround for transom placement. The MotoMember overview notes limitations for the in-hull setup it describes, including hull-material and sonar-type considerations. Confirm that the exact transducer and hull are supported before choosing that method. Similarly, kayak in-hull mounting advice should not be transferred to a powered boat without checking compatibility: the kayak-specific RCFact guide addresses a different installation context.
Installation requirements vary with the hull, transducer and boat use. Follow the exact model’s official manual for placement, mounting, cable connections and testing; seek qualified help when the work involves an uncertain hull penetration or wiring. A careful test can help identify a placement problem, but it cannot guarantee clear readings in every speed, water or operating condition.