





How to Connect and Leak-Check a Propane Patio Heater
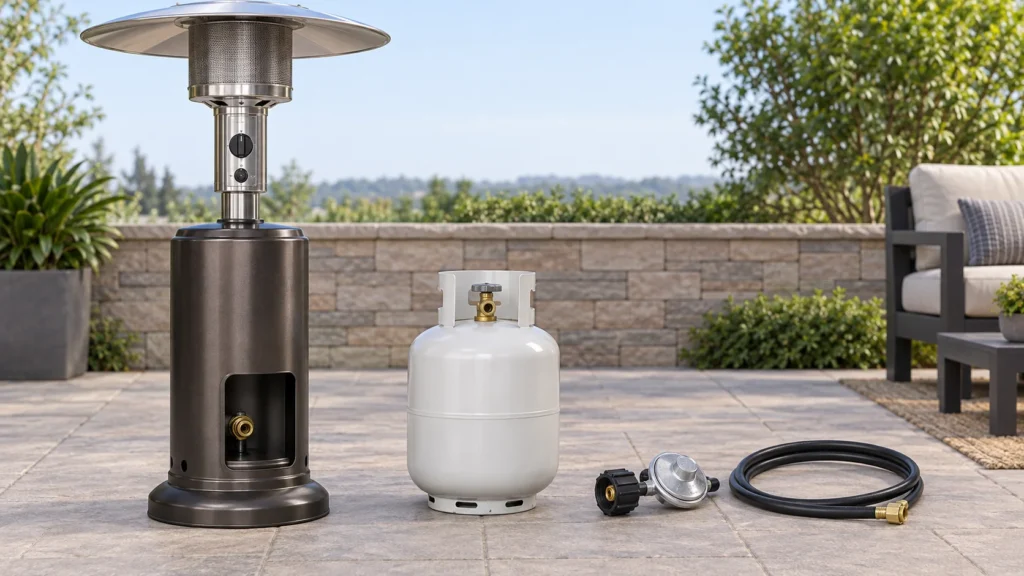
Before lighting a propane patio heater, confirm that its tank, regulator and hose are the setup specified for that particular heater, then check the connection for leaks. Do not assume that a cylinder or fitting is compatible because it looks familiar. The heater’s own manual is the authority for its connection, placement and lighting procedure; instructions can differ among models. The general connection and leak-check guidance here does not replace your manual.
This is a pre-use routine for an outdoor propane heater with a cylinder connection. It does not cover natural-gas or electric heaters, repair work, or a model whose manual requires another procedure. For shopping considerations, see TheTopZone’s patio-heater Top Picks.
Start with the manual and match the parts
Find the heater’s model-specific manual before connecting anything. Check what cylinder type and size it allows, how the regulator attaches, where the cylinder sits, and whether the hose and regulator supplied with the heater must be used. If a manual is missing, seek instructions from the manufacturer for the exact model rather than relying on a general statement about a brand. The ManualsLib patio-heater index lists manuals from many manufacturers, but a directory listing alone does not establish that a document applies to your unit.
Inspect the tank, regulator, hose and fittings before use. Do not proceed if a hose or fitting appears damaged, the connection does not fit smoothly, or the tank appears damaged. Do not modify a connector or force mismatched threads. If you cannot confirm compatibility from the manual or labels, stop and ask the heater manufacturer or a qualified propane supplier. A common-looking fitting is not proof of a safe match.
Set the heater outdoors on a stable surface, in the position and clearance specified by its manual. Make sure its controls are off and that it is cool before handling the connection. Keep it away from anything that could burn and do not operate it in an enclosed area. Follow the manual’s cylinder-positioning instructions; do not improvise a location or lay a cylinder on its side. The general connection guidance also emphasizes using the heater outdoors and following model instructions for placement and clearance (BBQ Gas Guys).
Connect with the cylinder valve closed
- Check that the heater controls are off. Confirm that the cylinder valve is closed, following its markings or instructions rather than guessing which way it turns.
- Position the cylinder as the heater manual directs. If the heater has a cylinder compartment or retaining bracket, use it as instructed; do not leave the cylinder unsecured if the manual calls for restraint.
- Line up the regulator fitting with the cylinder connection and attach it using the method specified for your setup. The supplied connection may be hand-tightened, but do not assume every fitting works the same way. Avoid tools unless the manual specifically requires them.
- Stop if the connector will not engage smoothly. Do not force it or try to make a mismatched fitting work. Check the model’s instructions and contact the manufacturer or a qualified supplier if the correct connection remains uncertain.
- Open the cylinder valve only as the heater manual directs. The general connection guide recommends opening it slowly; model-specific instructions take priority (BBQ Gas Guys).
A cylinder’s capacity is not a compatibility test. For example, if a heater manual names a particular cylinder type and connection, but the available tank has a different valve or you cannot verify its label, do not connect it just because its size seems familiar. Pause and confirm the exact combination using the manual or the heater manufacturer. This is a compatibility decision, not a reason to adapt the fitting.
Check the connection before lighting
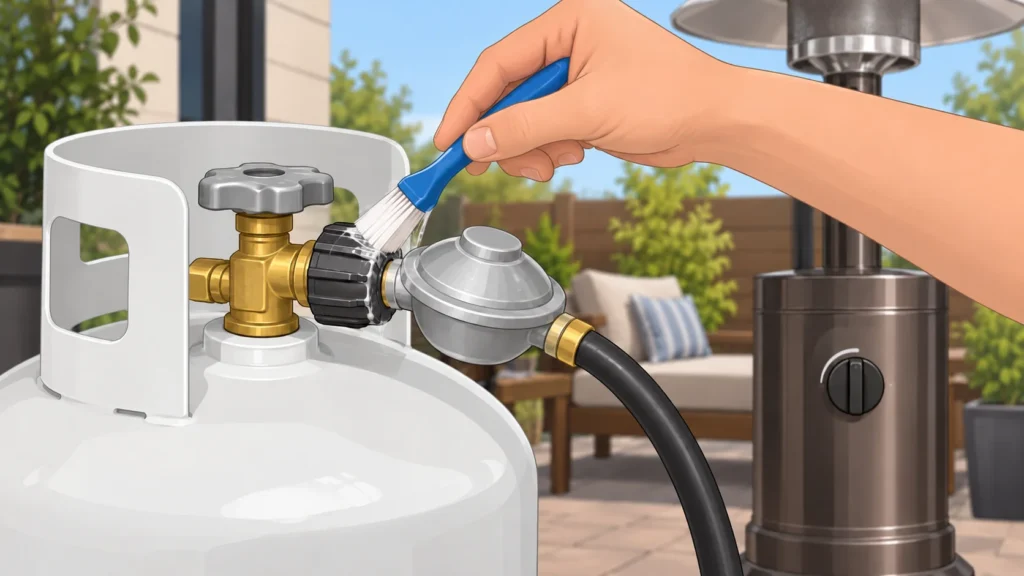
Use only a leak-check method allowed by the heater manual. The general connection guide describes applying a dish-soap-and-water solution to the tank-to-regulator connection and watching for bubbles. If your manual permits that method, apply the solution carefully to the connection while the cylinder is open as directed; do not use a flame to search for a leak. Growing or persistent bubbles can indicate escaping gas. Follow your manual’s complete procedure and any timing or inspection instructions rather than treating a brief look as a guarantee.
Do not light the heater until the required leak check is complete and the connection passes. A leak check is not a substitute for inspecting damaged parts, nor does a result at one joint prove that every part of the gas system is sound. If you cannot perform the check as specified, leave the heater off and ask the manufacturer or a qualified propane professional what to do.

If you smell propane, hear hissing, or see bubbles indicating a leak, do not light the heater or operate electrical switches nearby. Move people away from the area. If you can close the cylinder valve without approaching a hazard, do so; otherwise leave it alone. From a safe location, contact your propane supplier or local emergency services, particularly if the odor is strong or persists. Do not continue by disconnecting and reconnecting a suspected leaking fitting yourself. The supplied general guide advises shutting off the valve if safe and getting help for a leak that persists; this guide takes the cautious approach of stopping rather than attempting a repair (BBQ Gas Guys).
Light only as the manual directs
After a successful check, use the heater’s own lighting instructions. Control labels, ignition steps and any hold times are model-specific; do not transfer a lighting sequence from another heater or infer one from a general article. Keep to the manufacturer’s stated operating conditions and clearances. If the heater does not light as directed, turn it off and follow the manual’s instructions for what to do next. Do not keep releasing gas or repeatedly trying to ignite it in a way the manual does not permit.
If a propane odor appears at any point, stop the lighting attempt and follow the leak response above. Do not assume that a weak or unstable flame is simply an empty tank, or keep adjusting fittings while gas may be escaping. A heater that repeatedly fails to operate should remain off until the manufacturer or a qualified service professional has addressed the issue.
After use and when to stop
Turn off the heater and close the cylinder valve as directed by its manual. Before disconnecting or storing anything, follow the manual’s instructions and wait for the heater to cool. Store the cylinder only as its labeling, applicable local requirements and manufacturer instructions permit. Do not improvise storage or maintenance procedures based on advice for another model.
Leave the heater unused if its hose or regulator is damaged, the connection will not seal, the cylinder valve is difficult to operate, or you suspect a leak. Do not tape, patch, or otherwise repair gas-carrying parts yourself. Ask the heater manufacturer, a qualified propane supplier or a service professional about inspection and replacement. The general guidance on connecting a patio heater also emphasizes stopping when damaged parts or an unresolved leak are involved; confirm the exact next step for your model.
The useful habit is simple: verify the model-specific setup, connect only with the cylinder valve closed, complete the prescribed leak check, and light only when the check passes. If any part of that sequence is unclear, leaving the heater off is safer than guessing.