





How to Safely Load and Tow a Bicycle Cargo Trailer
Towing a cargo trailer changes how a bicycle accelerates, steers, corners and stops. The safest routine is not complicated: confirm that the trailer is compatible with the bike, place heavy items low and near the center, secure everything, and practise with a light load before riding in traffic. A trailer manual remains the controlling source for its load limit, hitch method, tire pressure and speed guidance.
For product-specific options, use our Top Picks for the best bicycle cargo trailers as a starting point, then verify the exact model’s manual and the bicycle manufacturer’s instructions before buying or riding.
Start with compatibility, not cargo capacity
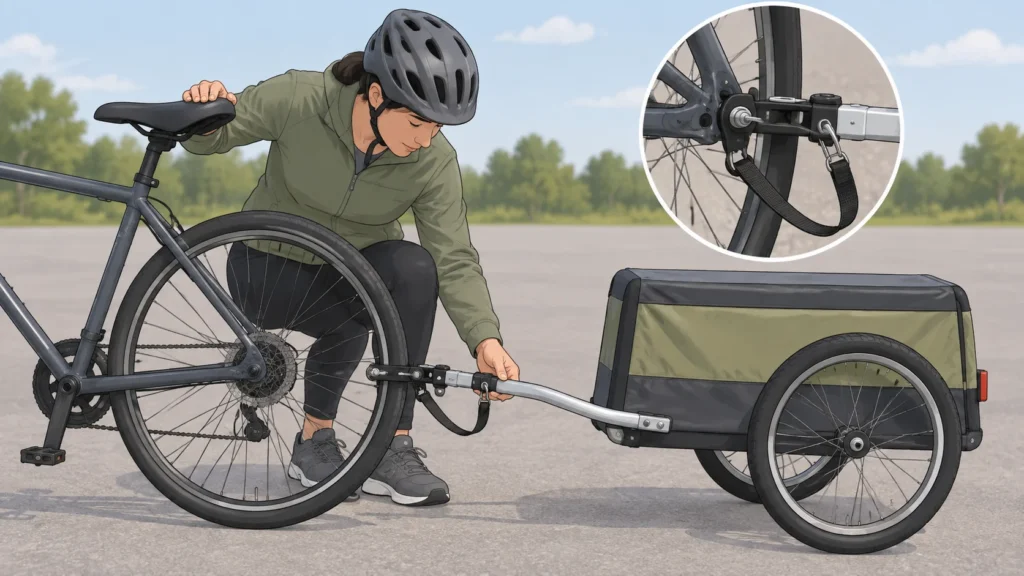
A trailer’s advertised capacity does not by itself prove that it can be attached safely to your bicycle. Identify the bike’s rear axle type—quick-release, nutted axle or thru-axle—and check the trailer maker’s compatibility documentation for that exact configuration. For example, the VEVOR CT910 manual reproduced by ManualsLib describes different attachment procedures for quick-release and nutted axles and says its supplied universal hitch is not suitable for a thru-axle. That is a model-specific limitation, not a rule for every trailer.
Compatibility can also vary within one manufacturer’s range. Burley’s official cargo-trailer collection notes that some bikes require hitch adapters, so check the exact trailer and bike combination rather than assuming that one hitch fits every bicycle.
Do not improvise with a hitch that does not fully engage the axle, skewer or coupling. Check that the hitch leaves the wheel securely clamped according to the bicycle manufacturer’s instructions, and use the trailer’s secondary safety strap or equivalent retention system when specified. If the axle is too short, the hitch hardware is unclear, or the coupling cannot move freely without contacting the wheel, stop and ask a qualified bicycle mechanic or the manufacturer.
Also check practical clearance. With the trailer attached, turn the handlebars fully both ways and confirm that the tow bar, safety strap and trailer cannot contact the tire, chain, disc rotor, derailleur or frame. A bicycle mechanic inspection is especially sensible after installing a new hitch or when towing near the bike’s limits.
Load low, centered and secured
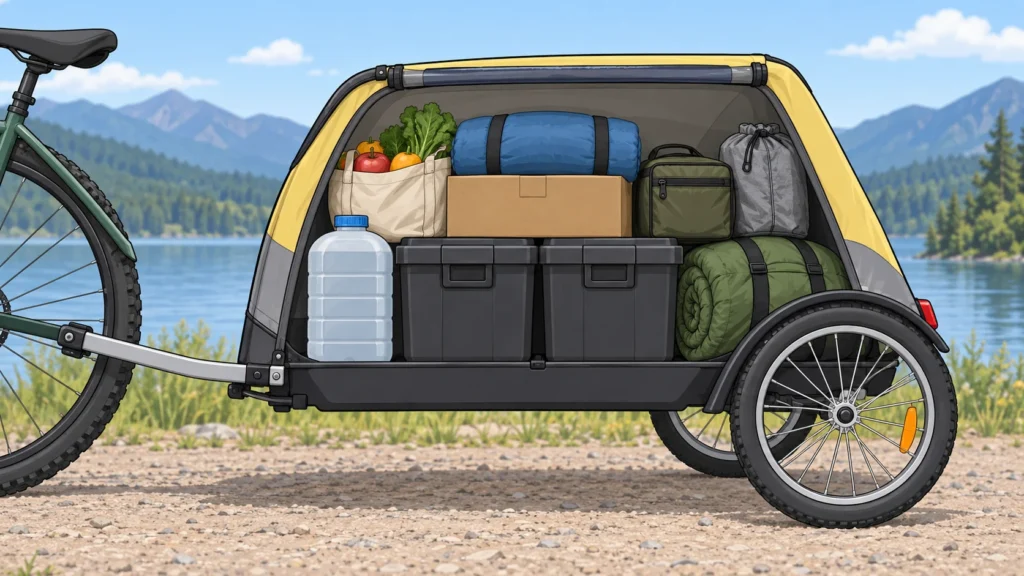
The goal is a stable trailer that follows the bicycle without tugging it sideways. Put dense items low in the trailer and as close to its centerline as the design allows. Spread lighter items around them rather than placing most of the weight at the rear, high above the axle or on one side. Keep loose objects from sliding by using the trailer’s straps, compartments or a suitable tie-down; close the cover when the manual requires it.
Do not treat a maximum load as a recommended everyday load. The CT910 instructions list a maximum trailer load of 125 kg (275 lb) but also warn that riding becomes difficult at that load and recommend reducing it; this figure should not be generalized to another trailer. The same instructions specify a particular hitch-load range and a bathroom-scale method for checking it. Follow that procedure only for that model and its stated range, rather than copying the number to another design.
Illustrative hitch-load example
Question: Is the loaded trailer’s hitch load within a model’s stated range?
Inputs: the rider weighs 75 kg; with the trailer loaded, lifting the tow-bar end produces a scale reading equivalent to 82 kg. Assumption: the manufacturer’s procedure is to compare the lifted reading with the rider’s weight, and the trailer manual supplies the permitted difference.
Calculation: 82 kg − 75 kg = 7 kg at the hitch.
Decision: compare 7 kg with the exact trailer manual’s permitted hitch-load range. If it falls outside that range, rearrange or reduce the cargo; do not compensate by tightening hardware beyond the instructions. This example illustrates the decision process only and does not establish a safe range for a different trailer.
Use a repeatable pre-ride check
Perform the check every time, including after loading, folding, transporting or removing a wheel. The CT910 manual’s pre-ride list is a useful model, but your own trailer’s instructions take priority.
- Wheels: Confirm that each wheel is fully seated, secured and free of obvious damage. Check tire pressure against the number printed on the tire sidewall or supplied by the manufacturer; do not exceed it.
- Frame and tow bar: Look for cracked tubing, bent parts, loose bolts, damaged fabric, worn connectors or missing pins. Confirm that folding locks and safety pins are engaged.
- Hitch and coupler: Verify that the hitch is fully attached, the coupler is closed, and every retaining pin or safety strap is connected as directed.
- Bike: Test both brakes, inspect the tires, and confirm that steering, pedals and drivetrain operate normally. The added trailer must not interfere with braking, pedaling or steering.
- Cargo: Check the total load against the model’s manual, secure every item, and close the cover. Recheck after a short distance because settling cargo can change balance.
- Visibility: Fit required reflectors and lights, and follow local roadway rules. Stop completely off the road before making adjustments.
Brake earlier and choose an easier gear
A loaded trailer adds mass that the bicycle’s brakes must slow. Begin braking earlier than you would without the trailer, use both brakes smoothly, and leave a larger gap from traffic. Avoid waiting until a corner or downhill section to make a hard stop. If the levers feel unusually soft, the wheels lock unexpectedly, or the bicycle cannot slow confidently, unload the trailer and resolve the mechanical problem before continuing.
Select a low enough gear before hills, starts and tight sections that you can pedal smoothly without standing and rocking the bicycle. Starting in an easy gear reduces the temptation to surge away from a stop. On a long climb, take breaks before fatigue causes imprecise steering or delayed braking. The appropriate gear depends on gradient, load, fitness and the bicycle’s gearing; there is no universal gear number.
Corner, descend and cross obstacles conservatively
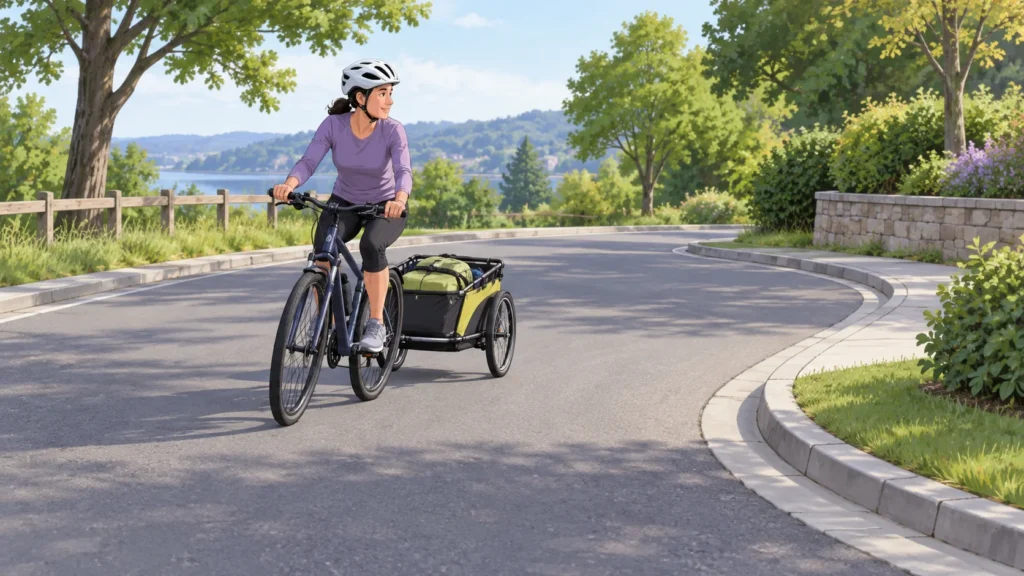
Take turns more slowly and make them wider where safe. A trailer tracks inside a bicycle’s path in a turn, so allow extra room from curbs, parked vehicles, posts and pedestrians. Signal early, check behind you, and remember that the trailer may extend farther than the bike. Avoid sudden swerves: a rapid direction change can make a high or uneven load shift and may lift or tip a wheel.
On descents, reduce speed before the slope becomes steep. Keep both hands in control, look well ahead, and brake progressively rather than making repeated panic stops. If the trailer begins to sway, do not accelerate to “pull it straight.” Ease off the pedals, keep the bicycle pointed steadily, and slow in a controlled line; stop in a safe place if the movement continues. Inspect the load, hitch and wheels before riding on.
Cross potholes, rails, curbs and other obstacles as close to square as conditions permit, at low speed. Avoid striking an obstacle with only one trailer wheel, which can destabilize or tip the trailer. If an obstacle is too large or visibility is poor, dismount and walk the combination instead.
Practise before carrying a full load
Use an empty or lightly loaded trailer in an open, quiet area first. Practise starting, stopping, looking back, signalling, gentle turns, tight turns, hill starts and a controlled emergency stop. Then repeat with the intended load, increasing it gradually. Listen for rattles or rubbing and observe whether cargo shifts. Manufacturer guidance for the CT910 recommends experimenting in an uncongested area and gives model-specific speed guidance; treat those figures as instructions for that model, not as a measured safe speed for every rider or trailer. Local law and road conditions may require a lower speed.
Do not use a cargo trailer for running or skating unless the manufacturer explicitly designs and approves it for that use. Passenger-carrying trailers also require different approvals and restraints; a cargo trailer should not be converted for passengers without explicit manufacturer authorization.
Quick towing checklist
- Read the exact trailer manual and confirm axle, hitch and bicycle compatibility.
- Inspect the bike, hitch, tow bar, frame, wheels, tires, pins and safety strap.
- Load heavy items low, centered and close to the trailer axle; prevent movement.
- Stay below the model’s stated load limit, while treating maximum capacity as an upper boundary rather than a target.
- Confirm the cover, reflectors, lights and required safety equipment.
- Test steering, braking and clearance before leaving.
- Ride slower, brake earlier, use an easier gear, and widen your turning margin.
- Stop safely if the trailer sways, rubs, tips, loses a pin or changes handling unexpectedly.
These practices reduce common causes of unstable handling and excessive braking strain, but they cannot overcome an incompatible hitch, damaged equipment, overloaded trailer or unsafe road conditions. When the manual is unavailable or conflicts with general advice, pause the trip and obtain model-specific guidance from the manufacturer or a qualified bicycle mechanic.