


How to Set Up an Electric Drill for Accurate Holes
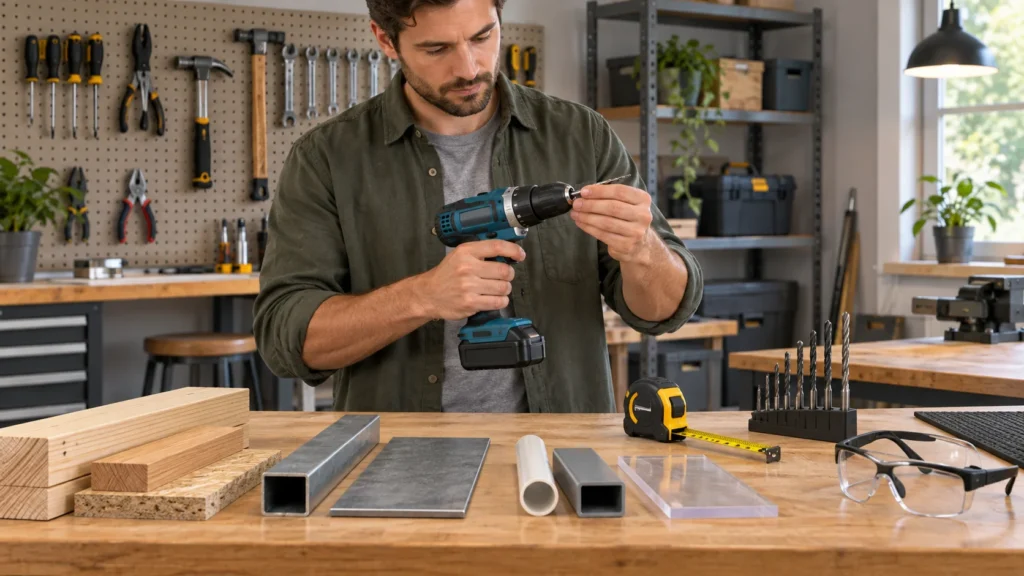
A clean hole starts before the trigger is pressed. The right bit, a secure fit, suitable speed, controlled torque, and steady alignment all matter. This setup applies to a typical drill/driver; consult your tool and bit instructions when they differ. A drill can make holes in wood, metal, and plastic, but the bit style and technique must match the material.
It is also useful to separate drilling from screwdriving. A drill setting is intended to let the bit cut; a clutch setting limits driving force and helps reduce stripped screw heads or damaged surfaces. The controls vary by model. For broader information about drill types, power, speed, size, and features, see this Popular Mechanics drill guide, which describes drills as tools for both drilling holes and driving fasteners.
Choose the Bit Before Setting the Drill
Start with the hole diameter and the material. Use a wood bit for wood, a metal-rated twist bit for metal, and a bit labeled for plastic or suitable for the specific plastic you are working with. A general-purpose bit is not automatically the best choice for every surface. For masonry, use a masonry bit and a drill with the appropriate hammer function only if the tool and bit instructions permit it; a rotary hammer technique shown in an inspiration page is not a substitute for the manufacturer’s instructions, so treat this Pinterest reference as visual inspiration rather than technical authority.
Check the bit for a bent shank, chipped cutting edges, or packed debris. A damaged bit can wander, cut slowly, or produce an oversized hole. Match the bit diameter to the fastener, anchor, or clearance requirement. If the hole must be a particular size, verify the diameter marking rather than relying on appearance.
When to Use a Pilot Hole
A pilot hole is a smaller first hole that guides a larger bit or reduces the force needed to start a hole. It is especially useful for larger holes in wood, brittle materials, or workpieces where the larger bit might skate. For a screw, choose a pilot diameter based on the screw and the material; the aim is to make room for the screw’s core without removing more material than necessary. A pilot hole is not always required for a small hole in softwood, but it can improve control.
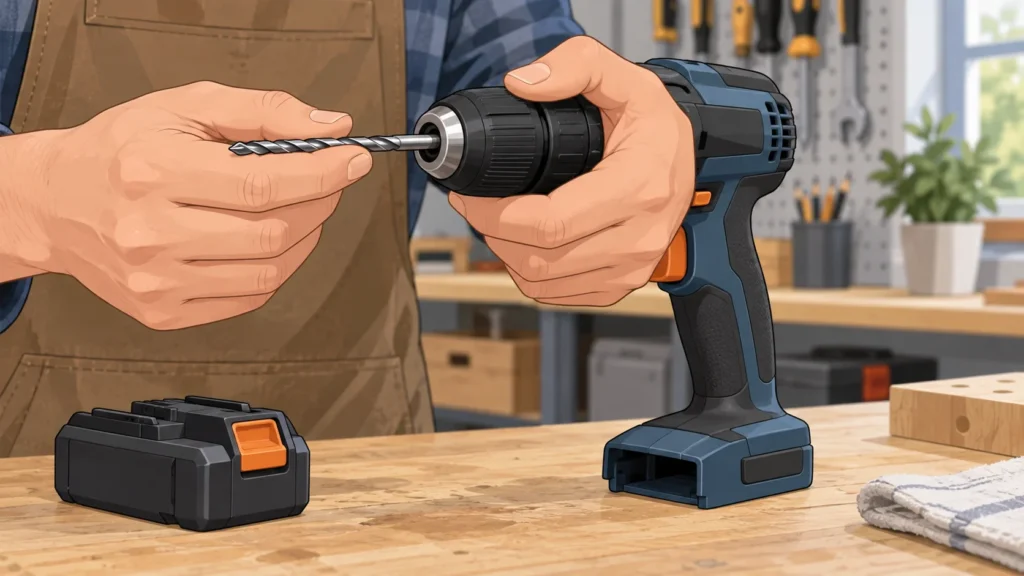
Insert and Tighten the Bit
- Disconnect power first. Remove the battery from a cordless drill or unplug a corded drill before changing the bit.
- Open the chuck. Turn the chuck sleeve by hand, or use the chuck key if your drill has a keyed chuck.
- Seat the shank. Insert the bit straight and far enough to grip securely, but avoid pushing a fluted bit so far that the chuck grips an unsuitable section. Keep the bit centered.
- Tighten evenly. With a keyless chuck, tighten firmly by hand at several positions around the chuck if the design allows. With a keyed chuck, tighten each available position. Do not use pliers or extensions to force a keyless chuck.
- Check the bit. Rotate the chuck by hand while watching the tip. If the bit visibly wobbles, remove and reseat it. Never test a loose bit at full speed.
For a hex-shank accessory, push the shank fully into the compatible holder and check that its locking sleeve or collar has returned to its locked position. The bit should not slide out when gently pulled. Use accessories that the drill’s instructions identify as compatible.
Set Speed and Direction
Use the lower speed range for larger bits, tougher starts, controlled screwdriving, and situations where you need more restraint. Use the higher range for smaller bits and faster cutting when the bit and material permit it. A two-speed selector normally changes the mechanical speed range; the variable-speed trigger then gives finer control within that range. Start slowly so you can confirm that the bit is centered and cutting where intended.
Direction should be set to forward for ordinary drilling. Reverse is primarily for backing out screws or withdrawing a bit when appropriate. Stop the drill completely before changing direction. Do not move the speed selector while the chuck is turning unless the manual specifically permits it.
Remember that maximum no-load speed is not a target for every task. The supplied Popular Mechanics testing article reports different drills with different speed and torque capabilities, reinforcing that published tool figures are model-specific rather than universal operating settings. Follow the bit maker’s recommended speed when one is provided.
Set the Clutch for the Task
For drilling, select the drill symbol or the setting identified by your manual as bypassing the screw-driving clutch. This allows the chuck to continue turning rather than stopping at a relatively low torque limit. On some drills, the hammer icon is separate and should be used only with compatible masonry work.
For driving screws, select a low-to-moderate clutch number first. Drive a test screw into a scrap of the same material, then increase or decrease the setting until the screw seats without stripping, sinking too far, or damaging the surface. A lower number generally limits torque sooner, but the numbering system and behavior vary by drill. The clutch is a control aid, not a replacement for the correct bit, steady pressure, or a manual torque specification.
If a screw head begins to cam out, stop. Confirm that the driver bit matches the screw recess and that you are pressing straight into the fastener. Increasing torque can worsen damage when the real problem is a poor bit fit or misalignment.
Mark and Support the Workpiece
Measure twice and mark the center of the hole clearly. On wood, make a small starter dimple with an awl or sharp nail if appropriate. On metal, a center punch can help keep a twist bit from skating; use eye protection and avoid striking a workpiece that is unstable or unsupported. On plastic, masking tape over the mark may make the location easier to see and can help the bit start cleanly, but test the approach on scrap when the surface is delicate.
Clamp or otherwise secure the workpiece. Do not hold a small piece in your hand while drilling. Check both sides for hidden wires, pipes, fasteners, or surfaces that could be damaged. Put a sacrificial board beneath material that may splinter on exit, especially when drilling wood. Leave room for the bit to pass through without contacting the bench.
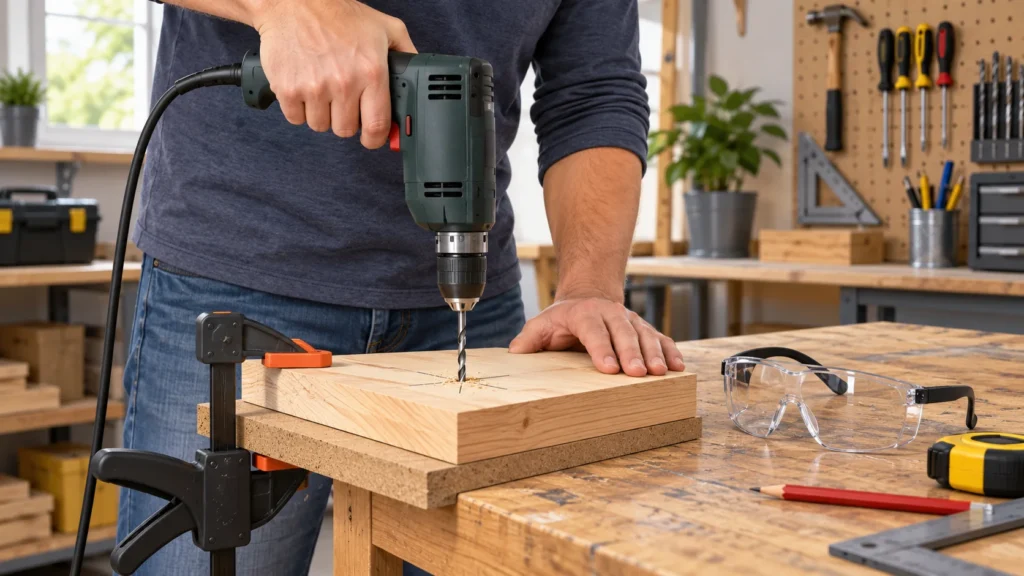
Drill Straight and Control Breakthrough
- Stand so the drill, bit, and marked point are in one line. Keep both hands on the tool where its design permits.
- Place the tip in the mark before squeezing the trigger. Begin at low speed and light pressure.
- Increase speed only after the bit has established a track. Keep the drill square to the surface; a simple angle guide or visual reference can help.
- Use steady pressure rather than forcing the tool. Let the bit’s cutting edges do the work. Excessive force can bend a bit, stall the motor, or enlarge the hole.
- As the bit approaches the far side, reduce pressure and speed. For a cleaner exit in wood, stop before breakthrough, check the opposite side, and finish from that side if the layout allows.
- Withdraw the bit while it is still rotating slowly, or stop first if the material could catch the flutes. Clear chips only after the drill has stopped.
Adjustments for Wood, Metal, and Plastic
Wood
Use a sharp wood-rated bit and support the exit side. A pilot hole can reduce wandering and splitting, particularly near an edge. For a large bit, start slowly and keep the drill aligned; periodically withdrawing the bit can help clear chips, but stop the tool before touching the bit.
Metal
Secure the work firmly and use a bit rated for the metal. Begin slowly to establish the hole, then follow the bit manufacturer’s guidance on speed and cutting lubricant. Metal edges can be sharp, so do not handle a freshly drilled hole casually. Remove swarf with a brush or another safe method after the drill is stopped.
Plastic
Use controlled pressure and avoid excessive speed or heat. Some plastics can melt, chip, or crack, so practice on an offcut when possible. Clear chips frequently and stop if the material begins to soften or deform.
Safety Check Before Drilling
- Wear eye protection and keep loose clothing, hair, and jewelry away from the rotating chuck.
- Secure the workpiece and identify what is behind or beneath it.
- Use a compatible, undamaged bit and a charged battery or safe power connection.
- Keep the drill’s vents clear and stop if the tool, bit, or material overheats.
- Remove the battery or unplug the drill before changing bits or clearing a jam.
- For unusually hard material, large holes, or masonry, consult the drill and accessory manuals before proceeding.
Hypothetical Worked Example
Suppose you need a clean hole for a small cable in a wooden shelf. You would first confirm the cable’s required clearance, mark the center, and check that no support or hidden wiring is behind the shelf. You might choose a sharp wood bit slightly larger than the cable, clamp the shelf, and place scrap wood underneath. With the battery removed, you would fit and center the bit, then select forward rotation, the low speed range, and the drill symbol rather than a numbered clutch setting. Starting slowly and square to the shelf, you would drill with moderate pressure, ease off near breakthrough, and inspect the hole before removing the bit. This example is hypothetical: the actual bit size, speed, and support depend on the cable, shelf, drill, and bit instructions.
Quick Setup Checklist
- Material: Is the bit appropriate for wood, metal, plastic, or another surface?
- Size: Does the diameter match the hole, anchor, or fastener requirement?
- Condition: Is the bit straight, sharp, clean, and compatible with the chuck?
- Fit: Is the shank fully seated and the chuck securely tightened?
- Controls: Is forward selected, is the speed range suitable, and is the clutch on the correct mode?
- Layout: Is the mark accurate, and have you checked behind the workpiece?
- Support: Is the work clamped, with backing where breakthrough could damage it?
- Technique: Can you start slowly, remain square, and ease pressure near the exit?
- Safety: Are eye protection and a clear workspace ready before power is connected?
For help choosing among drill types and features before you begin, browse TheTopZone’s Best Electric Drills Top Picks. Use the buying information there as a starting point, then confirm the selected tool’s manual and the bit maker’s instructions for your particular job.